We use cookies for personalizing content and ads and providing social media features. Your usage information on our website will be used for social media, advertising, and traffic analytics, or shared with our partners. Clicking "Accept" means you agree to use our cookies .
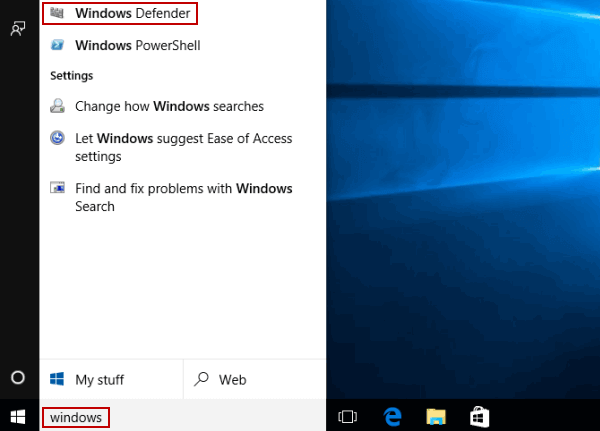
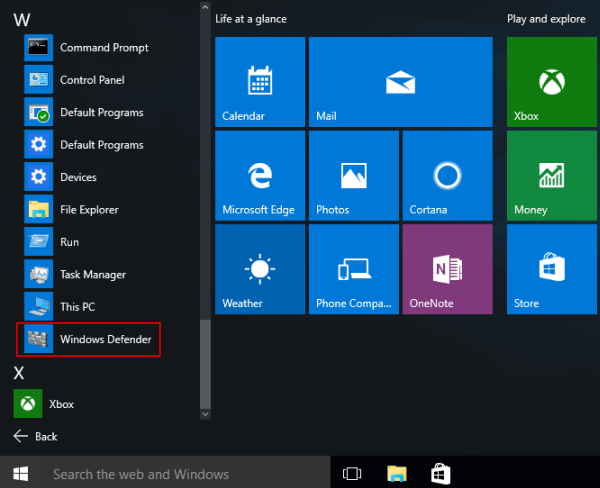
Windows Defender, now known as Microsoft Defender, is the built-in antivirus software for Windows. It provides real-time protection against malware, viruses, and other threats. The article summarizes some methods to open and use Windows Defender on Windows 8/10 computer for your reference.
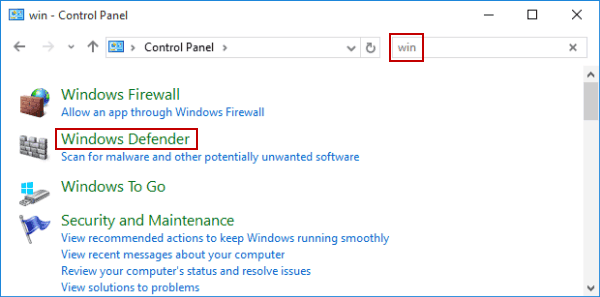
Step 2: Input win in the top-right box and tap Windows Defender in the options.
Way 5: Turn it on in Disk C.
Step 1: Access Disk C/Program Files/Windows Defender.
Step 2: Open MSASCui.
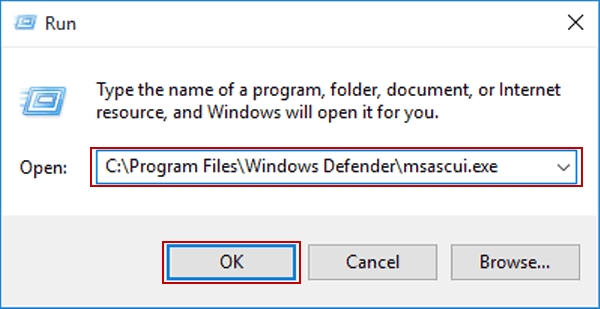
Way 6: Open it by Run.
Press Windows+R to show the Run dialog, type C:\Program Files\Windows Defender\msascui.exe and hit OK.
Part 2: How to Use the Windows Defender?
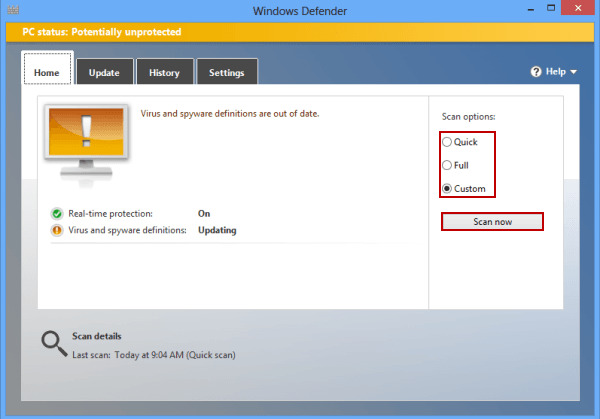
Open Windows Defender. In the Home settings of Windows Defender, choose a scan option from Quick, Full and Custom on the right, and tap Scan now button.
Tips:
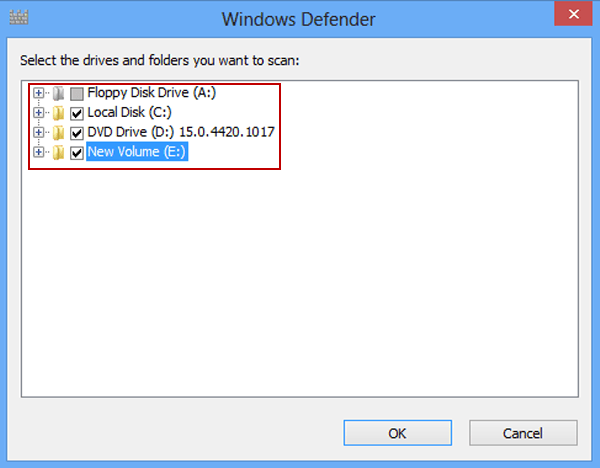
Quick scan checks the areas that malicious software, including viruses, spyware and other potentially unwanted malware, are most likely to infect. Full scan checks all the files on the hard disks and all your running programs, and it can take more time depending on your system. Custom scan checks only the files and locations that you select, as shown in the following picture.
Step 3: Suppose viruses or other malware are detected, remove them according to the prompts.
Part 3: How to Enable the Windows Defender?
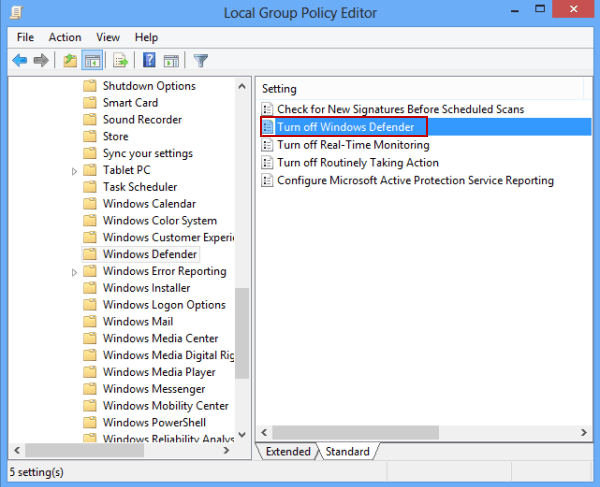
Method 1: Enable Windows Defender in Group Policy.
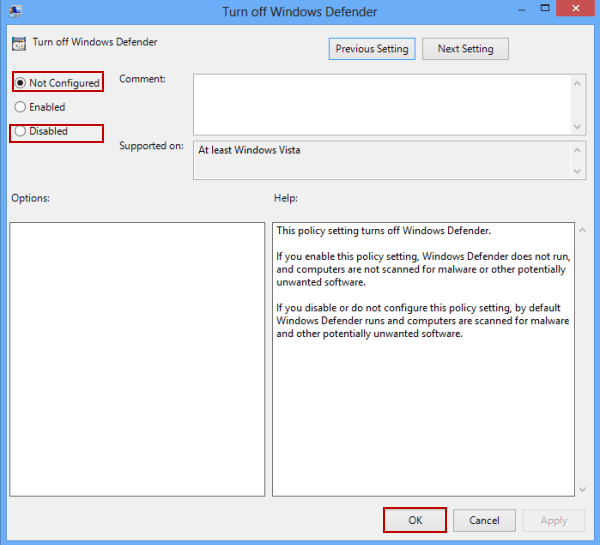
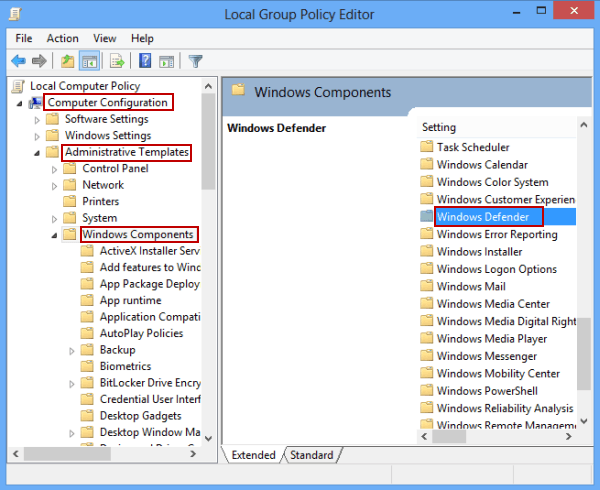
Step 2: Locate and open the "Turn off Windows Defender" setting.
It is in Computer Configuration/Administrative Templates/Windows Components/Windows Defender.
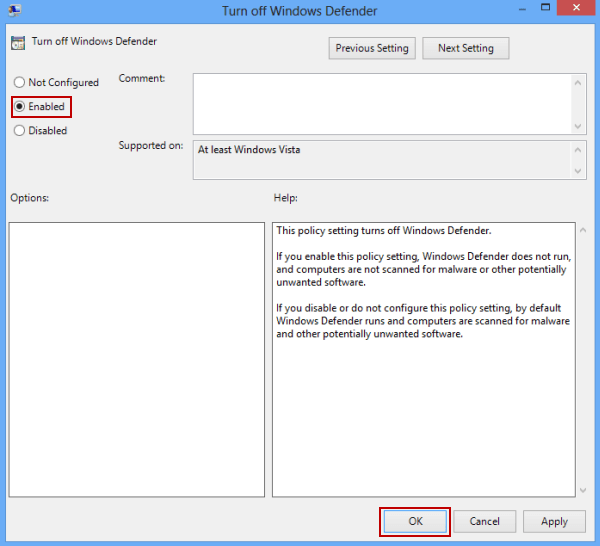
Step 3: Choose Not Configured (or Disabled), and click OK.
Method 2: Enable Windows Defender in the Action Center.
Step 1: Access Control Panel, input action center in the top-right search box and tap Action Center to get into it.
Step 2: Tap the Turn on now button on the right of "Spyware and unwanted software protection (Important)".
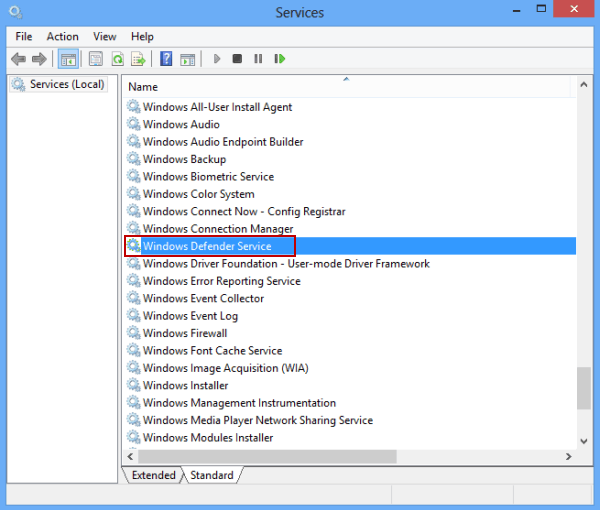
Method 3: Enable Windows Defender in Windows Defender Service.
Step 1: Type services in the Windows search bar, choose Settings and open Services.
Step 2: Find and double-click Windows Defender Service.
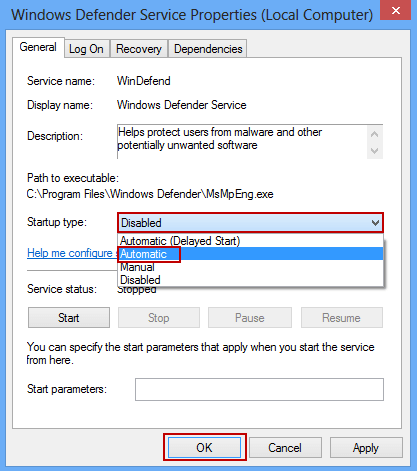
Step 3: As the Windows Defender Service Properties window turns up, in General settings, click the bar beside Startup type, choose Automatic from the drop-down list and tap OK to complete the setting.
Part 4: How to Disable the Windows Defender?
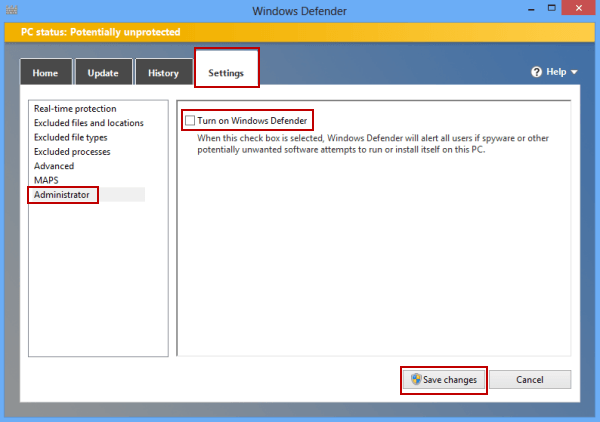
Way 1: Disable Windows Defender in the app's Settings.
Start Windows Defender. Enter Settings, choose Administrator on the left, uncheck the small box before Turn on Windows Defender on the right and click Save changes on the bottom.
Step 2: Find and open Windows Defender folder which is located in Computer Configuration/Administrative Templates/Windows Components.
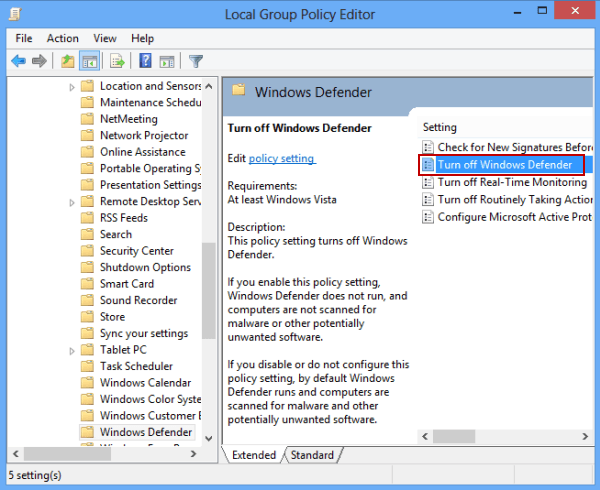
Step 3: Access the setting called Turn off Windows Defender in Windows Defender folder.
Step 4: Choose Enabled and tap OK to enable the setting.
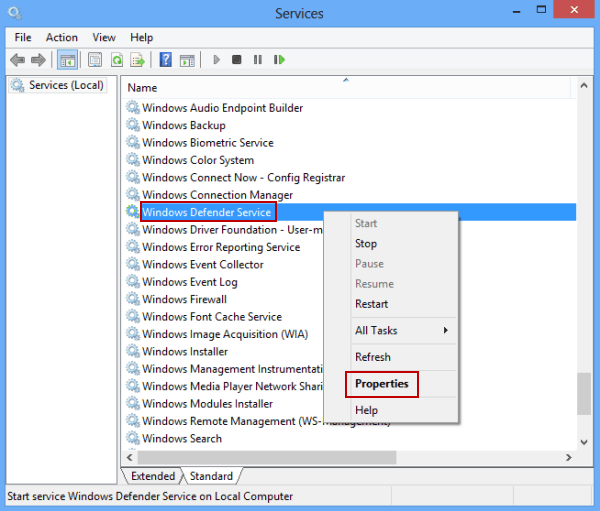
Way 3: Disable the Windows Defender in Services.
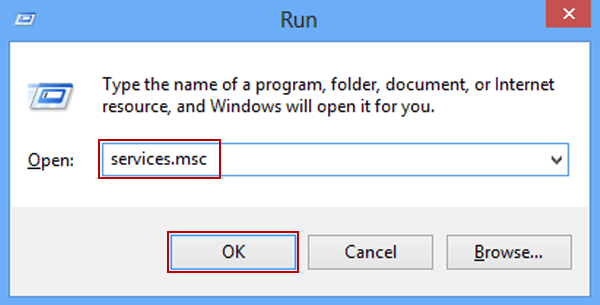
Step 1: Press Windows key+R to open Run dialog, enter services.msc and click OK to enter Services.
Step 2: Right-click Windows Defender Service in the Services window, and select Properties in the context menu.
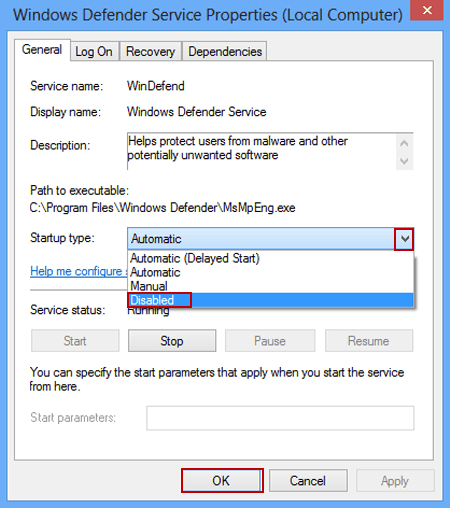
Step 3: As the Windows Defender Service Properties (Local Computer) dialog appears, in General settings, click the small down arrow and choose Disabled as the startup type. Then, tap OK to finish the setting.
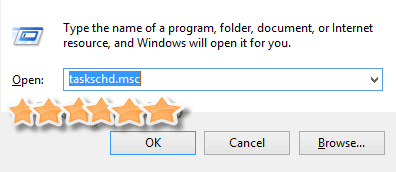
You can press Windows Key + R combination and type taskschd.msc in the Run dialog then click OK to access Task Schedule.
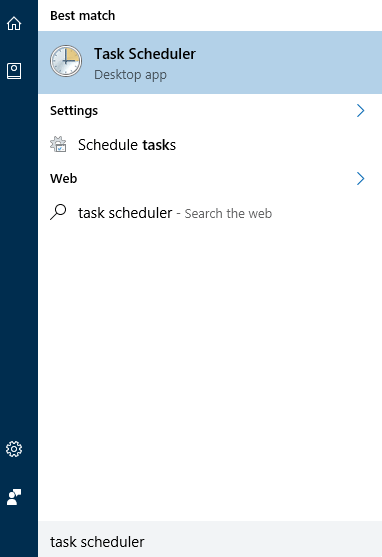
Or type Task Scheduler in Start menu and then clicking Enter key to open it.
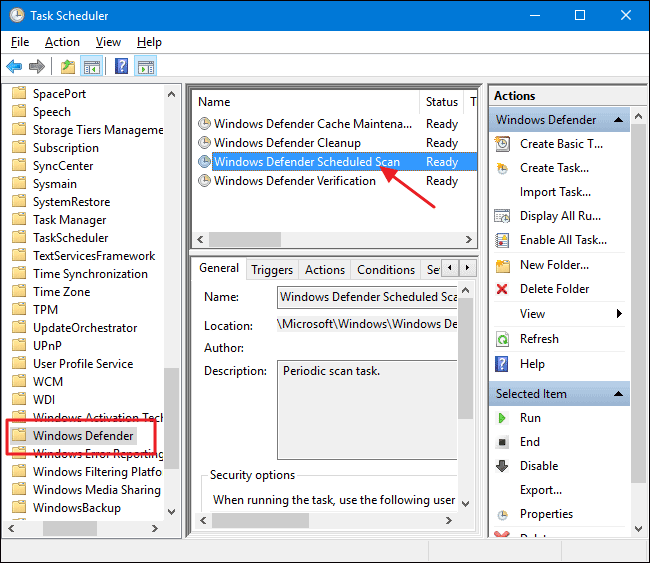
Step 2: On the Task Scheduler window, in the left panel, you should follow the navigation chain as Task Scheduler >> Task Scheduler Library >> Microsoft >> Windows >> Windows Defender. Now in the middle panel, select Windows Defender Scheduled Scan then Right clicking on Windows Defender Scheduled Scan and click Properties option to open Windows Defender Scheduled Scan Properties (Local Computer) dialog.
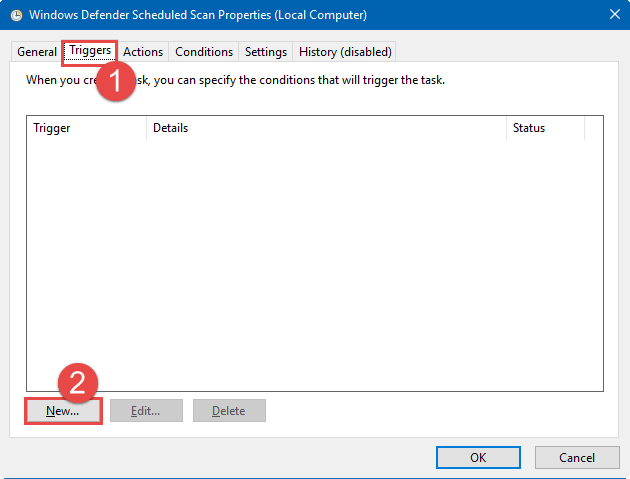
Step 3: Find Triggers option then clicking it, then click "New" button in the left bottom of the dialog.
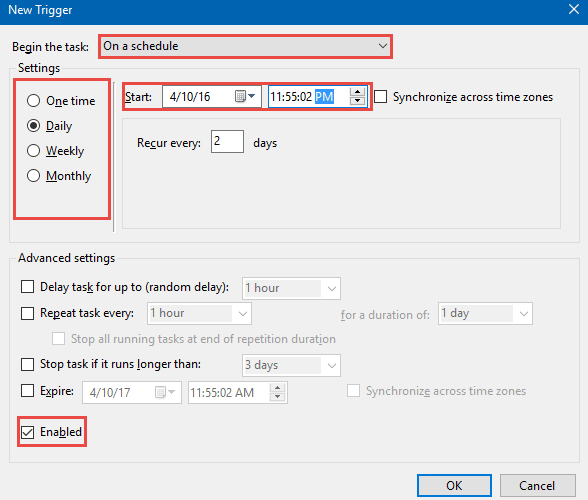
Step 4: In this new dialog, you can dominate when to begin the scan, how often you want to schedule a scan.
Part 6: How to Add and Remove Exclusions in Windows Defender
Step 1: Click the Windows icon on the desktop and then choose Settings to open.
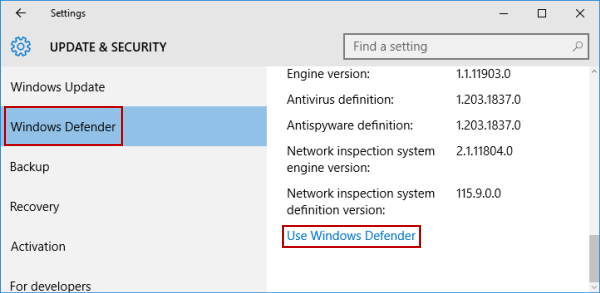
Step 2: Choose Update &Security> Windows Security. After that, hit the Virus & threat protection under Protection areas.
Step 3: On the right panel, you can find Manage settings option under Virus & threat protection settings. Click it to continue.
Step 4: Go down and find Exclusions section. Hit Add or remove exclusions.
Step 5: Click the Add an exclusion button. Four types of exclusion are supported:
File: Excludes a specific file.
Folder: Excludes an entire folder and its contents.
File type: Excludes all files with a specific extension (e.g., .exe, .docx).
Process: Excludes a running process.
You can select the item you want to exclude and confirm the action.
After completing these steps, Windows Defender will no longer scan the specified file, folder, file type, or process.
As to removing the exclusion, you can select the exclusion you want to delete, then click the down-arrow and the Remove button appears. Hit on the Remove button and this exclusion will be removed from the list. Once removed, Windows Defender will resume scanning the file, folder, file type, or process for threats.
Note:
If you are using the older Windows 10 version, you can directly access the Add an exclusion button in Settings> Update & security > Windows Defender.