We use cookies for personalizing content and ads and providing social media features. Your usage information on our website will be used for social media, advertising, and traffic analytics, or shared with our partners. Clicking "Accept" means you agree to use our cookies .
What to do if Windows 10 keeps going into sleep mode? Some users reported that they encountered a tricky issue that their Windows 10 computer goes to sleep after 1 minute or 2 minutes randomly. It is very annoying as you have to constantly wake up your computer so that you can use it again. Follow the below troubleshooting methods to fix this problem.
Method 1: Check Power Plan Settings via Control Panel
If your power plan setting is set to put the computer to sleep in a very short time, maybe you will face the issue that computer goes into sleep mode randomly. So the first thing that you should do is to check the power plan settings and edit it if necessary.
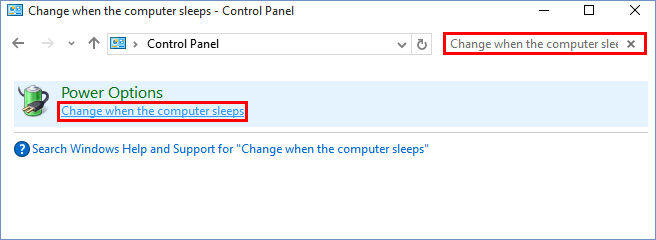
Step 1: Open Control Panel and enter Change when the computer sleeps in the search bar in Control Panel. You will see the result appears under Power Plan and click it.
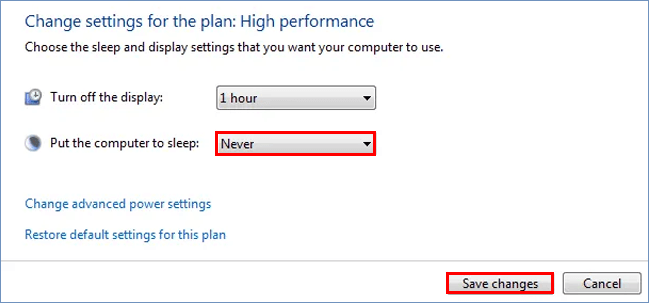
Step 2: Then you will come to an interface where you can choose the sleep and display settings that you want your computer to use. There you'll see two options: Turn off the display and Put the computer to sleep. You can set Turn of the display setting to whatever value you desire. As for Put the computer to sleep setting, you'd better change the value to a longer time.
Notice: Sometimes the problem may occurs when your power plan settings are not working properly and normally, so you can choose to click Restore default settings for this plan here to reset it to the default to see if that helps.
Step 3: Click Save changes and check if the computer still keeps going to sleep.
Step 4: Hit Change advanced power settings and go to expand the Sleep settings. Make sure the Sleep after is set to Never. And Allow hybrid sleep is set to off. Allow Wake Timer is set to disable. Click OK to save changes.
Method 2: Change Your Power Settings in Registry Editor
Windows 10 goes to sleep after 2 minutes? You can fix this problem by modifying the registry and change the power settings.
Step 1: Press Windows+R to open the Run dialogue, enter regedit and click OK>Yes to open Registry Editor.
Step 2: In the left pane of Registry Editor, navigate to:
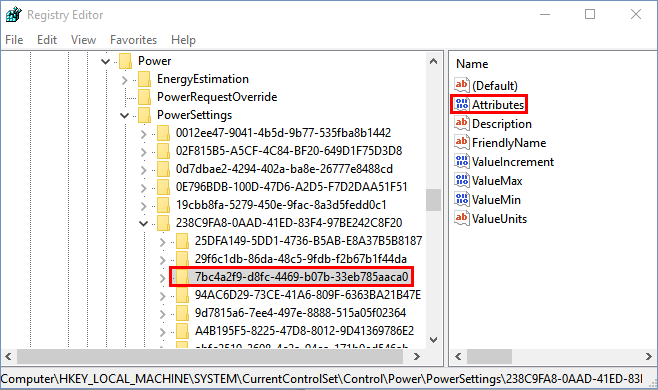
HKEY_LOCAL_MACHINE > SYSTEM > CurrentControlSet >Control > Power > PowerSettings > 238C9FA8-0AAD-41ED-83F4-97BE242C8F20 > 7bc4a2f9-d8fc-4469-b07b-33eb785aaca0.
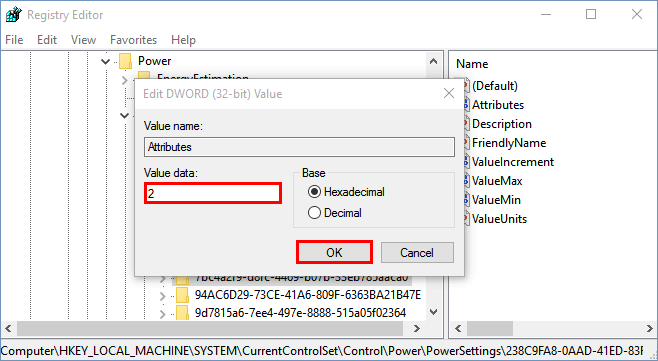
In the right panel, double click Attributes.
Step 3: Then a small windows will pop up. Change the Value data to 2 and click the OK button to save changes.
After doing this, you should change the advanced power settings from Settings:
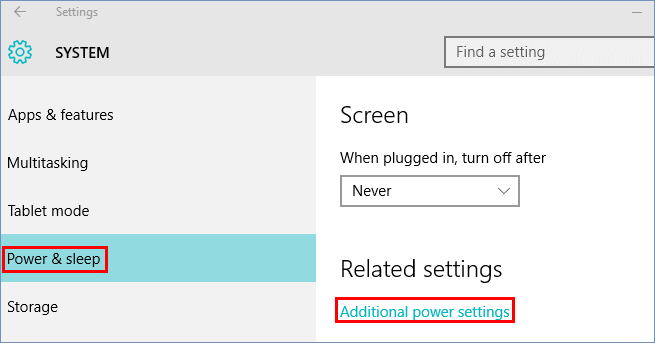
Step 1: Go to Settings>System>Power&sleep and then click Additional power settings under Related settings.
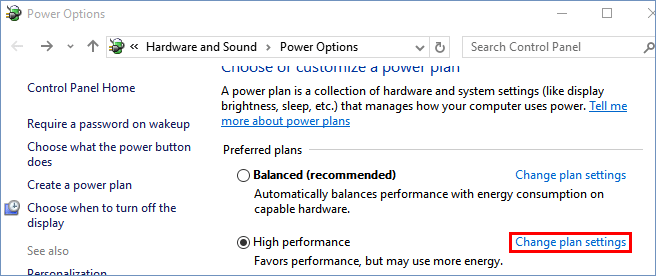
Step 2: Click Change plan settings next to your power plan.
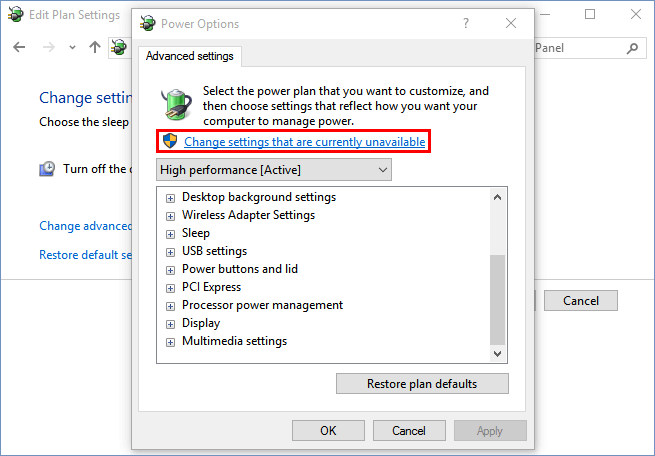
Step 3: Click Change advanced power settings on the next interface. Then the Power Options panel will open and then click Change settings that are currently unavailable.
Then go to Sleep>System unattended sleep timeout and change the value to a longer time. And then click OK to save changes.
Method 3: Edit Your Screen Saver Settings through Settings
If Windows 10 goes to sleep after 2 minutes, there maybe something wrong with your screen saver. So you can try to solve the problem by editing your screen saver settings.
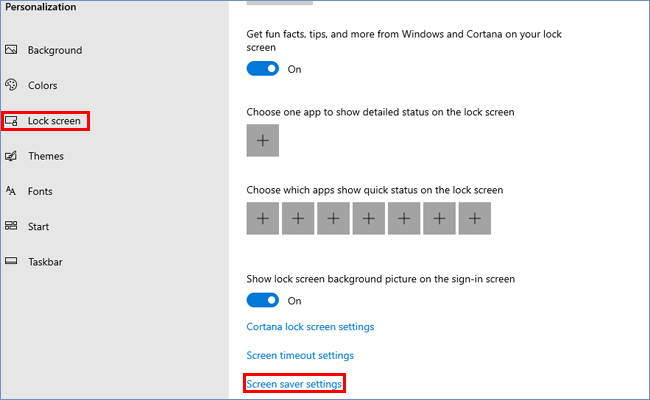
Step 1: Go to Settings>Personification and then select Lock screen on the left pane. Click Screen saver settings on the right pane.
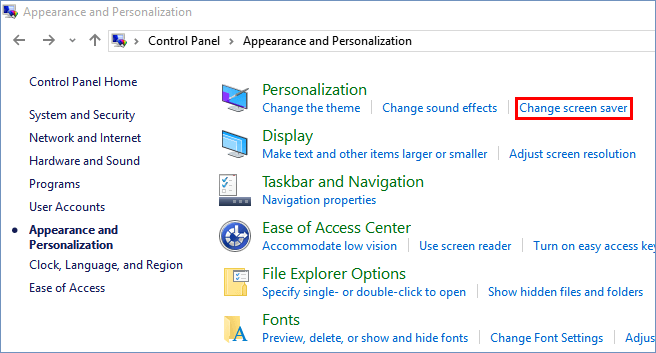
Alternatively, you can go to Control Panel>Appearance and Personification>Change screen saver.
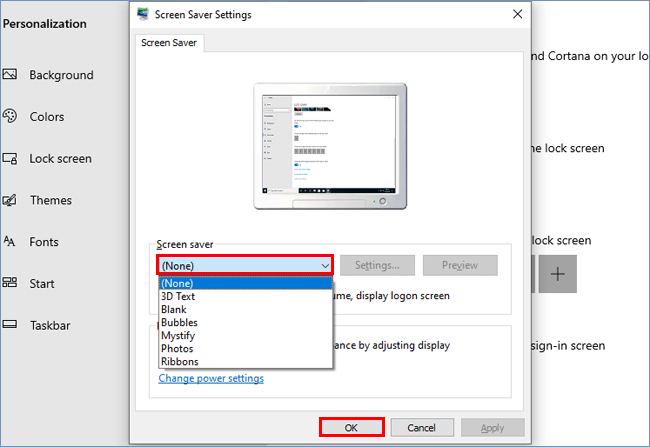
Step 2: Set the Screen saver to None. Click OK to save changes.
Method 4: Run the Power Troubleshooter from Settings
In order to fix the issue that computer randomly goes into sleep mode, you can run the Power troubleshooter. Power troubleshooter is an effective tool to detect the common problems with your power plan settings and resolve them automatically.
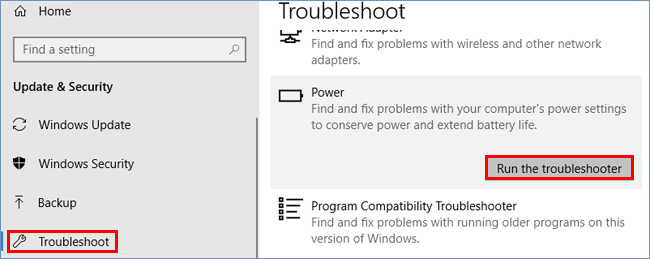
Step 1: Open Settings and select Update & Security.
Step 2: Choose Troubleshoot from the left pane and scroll down the right pane to find Power and then run the troubleshooter.
Step 3: Then the troubleshooter will start to work and you can follow the on-screen instructions to complete the process.
Method 5: Change the Power Button Settings to Do Nothing
When you encounter the issue that computer randomly goes to sleep, the last but not least method recommended to you is to change the power plan button settings to do nothing.
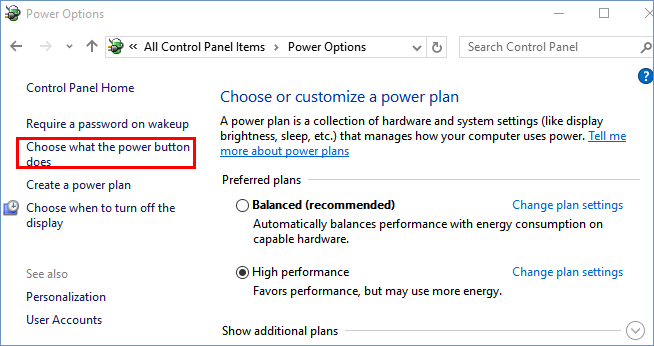
Step 1: Navigate to Control Panel> Power Options.
Step 2: Select Choose what the power button does in the left pane.
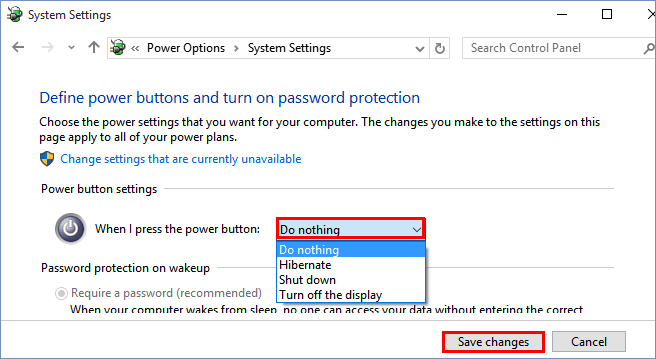
Step 3: Under Power button settings, set When I press the power button to Do nothing and then click Save changes.
Method 6: Disable Specific Scheduled Tasks
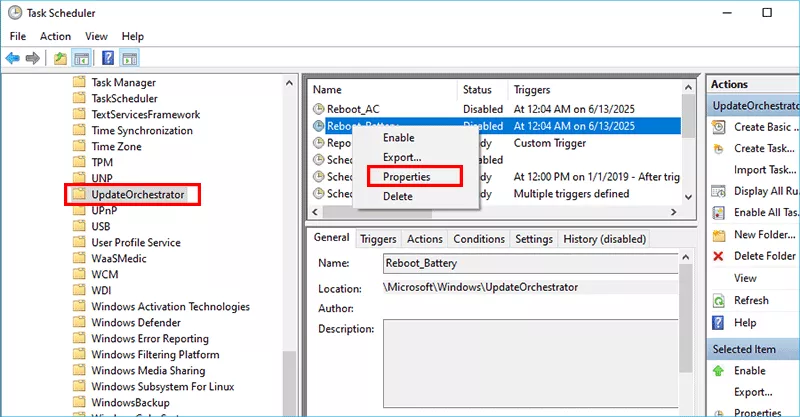
To stop unattended wake events, you can open Task Scheduler, expand Microsoft > Windows, then choose UpdateOrchestrator. Go to the middle panel and right-click the Reboot_Battery option to choose Properties.
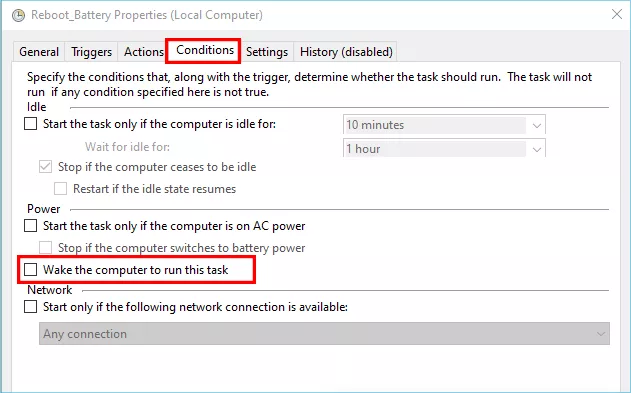
After that, click Conditions tab and uncheck Wake the computer to run this task. This can fix sleep caused by update tasks.
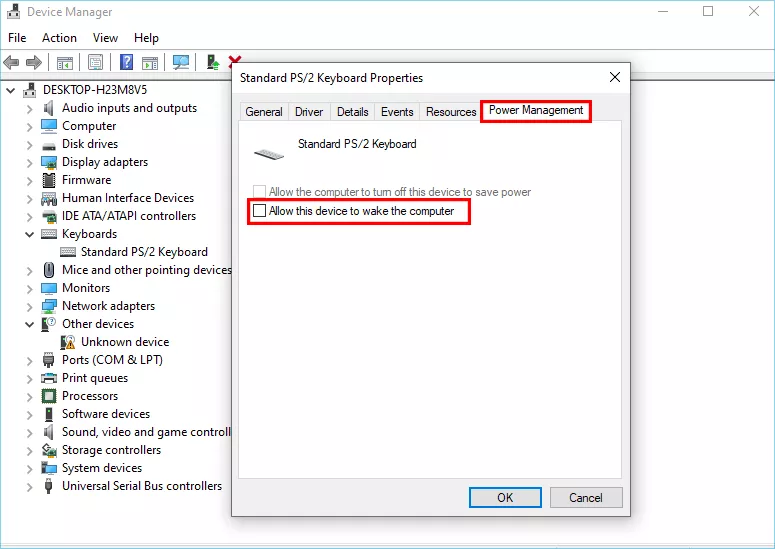
Method 7: Adjust Device Wake Settings
Some hardware can wake your PC. The following settings can help stop sudden wake-ups.
You can open Device Manager and expand category like Keyboards. Then right-click a device and choose Properties. Hit the Power Management tab and uncheck Allow this device to wake the computer. Finally, hit the OK button to save the change.
FAQs on Laptop Goes to Sleep Randomly
Q1: Why does my PC sleep randomly even after setting "Never"?
Hidden timers (e.g., unattended sleep) or scheduled tasks can override your settings. Adjusting those resolves the issue.
Q2: How do I find what woke my PC?
Run powercfg /lastwake in Command Prompt (admin) to see the wake source.
Q3: My laptop keeps sleeping randomly, what to do?
You can try the above methods to prevent Windows 10 PC from sleeping randomly.
Conclusions
By following these steps, you can fully control sleep behavior on Windows 10 and prevent your PC from going to sleep randomly or waking unexpectedly.