The most terrible thing in work would be that you kept all the data in the laptop, but you forgot the password and failed to get into the laptop after inputting the possible passwords. Here, we will discuss how to get into a laptop without password without data loss. In the following solutions, we will take the laptop in Windows 7 as an example.
- 1. Utilize iSunshare Windows Password Genius to unlock the laptop
- 2. Use Windows installation disk to reset the forgotten password
- 3. Try free Windows password recovery tool
1.Utilize iSunshare Windows Password Genius to unlock the laptop
iSunshare Windows Password Genius is the reliable and professional Windows password recovery tool which can recover passwords for varied operating systems such as Windows 10, Windows 7, Windows 8, Windows Vista, Windows XP, Windows NT, Windows 2000, Windows 2003, and Windows 2008/2012/2016. It is safe for everyone to remove/reset Windows forgotten password with this affordable software.
Step 1: Finish the preparation work: purchase, download and install iSunshare Windows Password Genius Professional in another usable computer.
Step 2: Create Windows password recovery disk with USB or CD/DVD.
We prefer choosing the USB option as the recovery disk. And this step contains 4 sub procedures in total, while the sub-procedures of choosing CD/DVD are much the same as the following process.
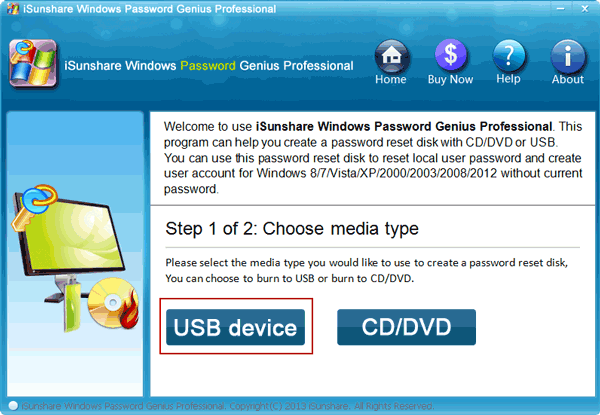
1. Click USB device in the screen automatically shown after successfully installing the software.
2. Insert a USB device and click Begin burning.
3. Hit Yes as a WARNING screen turns up.
4. Click OK after the USB drive is burning successfully.

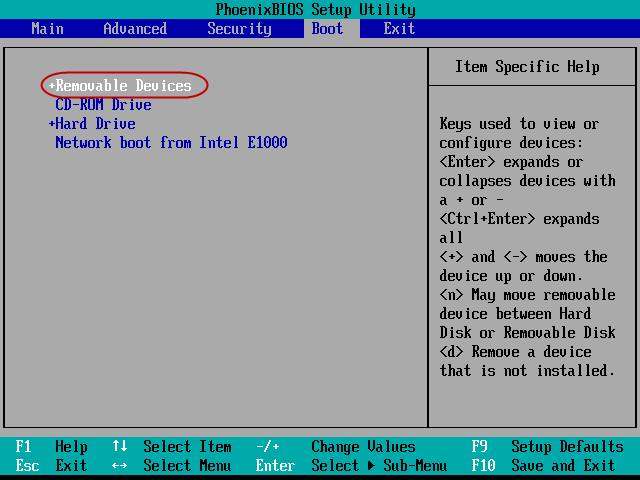
Step 3: Set the locked laptop to boot from the USB device.
Insert the USB device to locked laptop and start the laptop. Then immediately press F2/F1/F8/F9/F10/F11/F12/Delete on the keyboard until the following interface appears. Select Boot by →, locate Removable Devices with ↓ and move it to the first one in the boot list by +. Then click F10 on the keyboard to save the changes and exit.
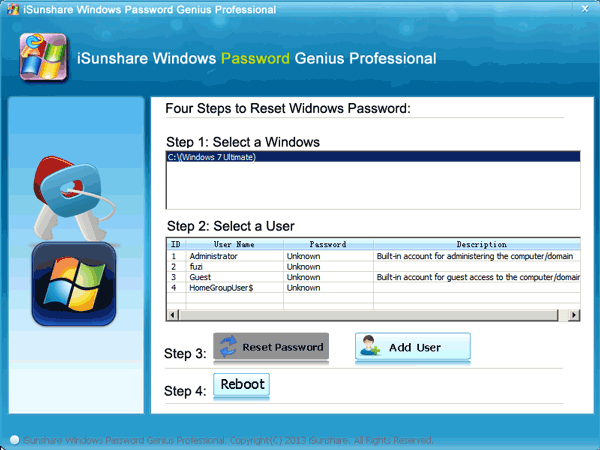
Step 4: Select Windows and User after the next screen appears, then click Reset Password.
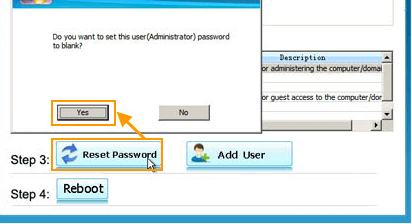
Step 5: Hit Yes after a screen pops up asking you whether you want to set the user (Administrator) password to blank or not. Then the password is set as Blank.
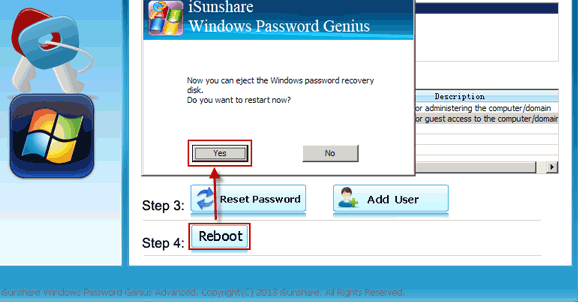
Step 6: Click Reboot, then hit Yes as prompt box shows. Eject the recovery disk (referring to USB device in this case) and the laptop will restart.
After following the steps, we are able to get into a laptop without password. And you can keep this USB disk in case you or your friends suffer the same situation again.
2. Use Windows installation disk to reset the forgotten password
This solution is only for those who use Windows 7. All they need is a copy of the Windows installation disk and the simple command line trick.
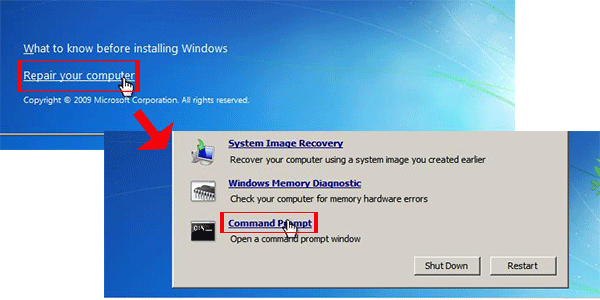
Firstly, you need to boot off the Windows disk and choose Repair your computer. Then, you will get three options: System Image Recovery, Windows Memory Diagnostic and Command Prompt. Select the last one to access Command Prompt.
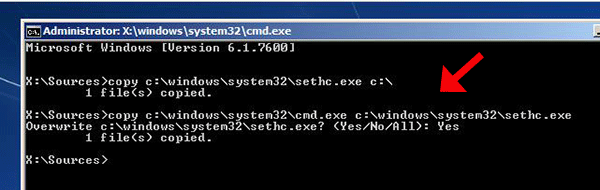
Then, in order to back up the original sticky keys file, you need to type in this command:
copy c: \windows\system32\sethc.exe c:\
Next, it is necessary to copy the cmd.exe over top of sticky keys executable as the screenshot shows:
copy c: \windows\system32\cmd.exe c:\windows\system32\sethc.exe
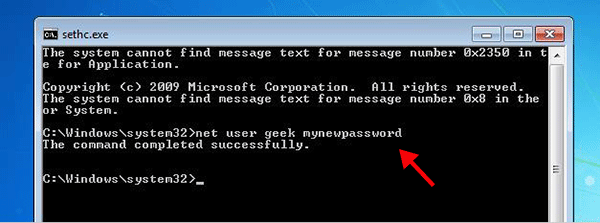
Now it is time to reboot the laptop. After you go to the login interface, press the Shift button 5 times and you will get the following interface.
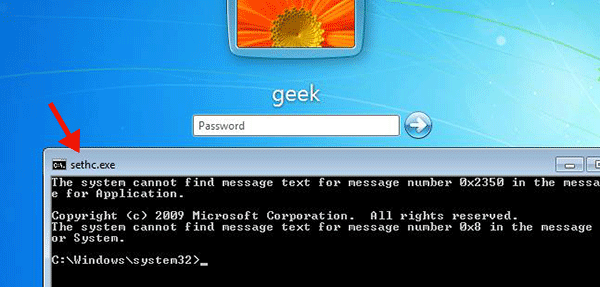
At this time, you need to type the following command to set the new password:
net user geek MyNewPassword
At last, you can login the laptop with a new password.
3. Try free Windows password recovery tool
When it comes to the free Windows password recovery tool, you can refer to this article where recommends 7 free Windows password recovery tool for users. There are specific and convincing analyses for advantages and disadvantages of the tools. You can also have a test about these tools.
Related Articles: