After you successfully recover iPhone lost data with iOS Data Genius, how can you transfer data on computer to iPhone?
It is certain that there are several ways to transfer files between iPhone and computer or other iOS device. Now we mainly introduce how to transfer data on PC to iOS devices with iTunes and apps.
- Way 1: Transfer Files between Windows PC and iOS Device using iTunes
- Way 2: Transfer Files on Mac Computer to iOS Device with Apps
First Way: Transfer files between Windows PC and iOS Device using iTunes
- Connect iPhone to your computer using the included cable.
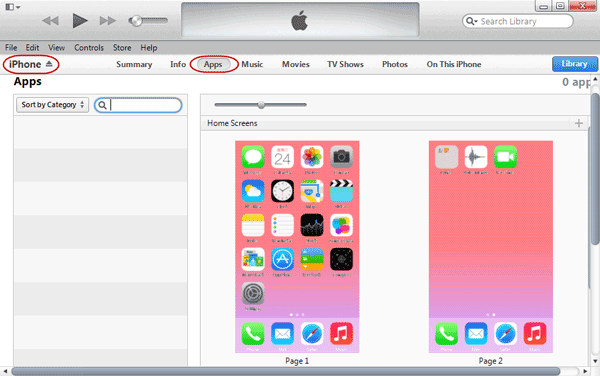
- In iTunes on your computer, select iPhone, and then click Apps.
- Use the File Sharing section to transfer documents between iPhone and your computer.
Apps that support file sharing appear in the File Sharing Apps list in iTunes. To delete a file, select it in the Document list, then press the Delete key.
Example: Sync Photos on Windows computer to iPhone with iTunes
Step 1: Connect iPhone to computer and open iTunes on computer.
Step 2: Click iPhone in iTunes and then click “Photos”.
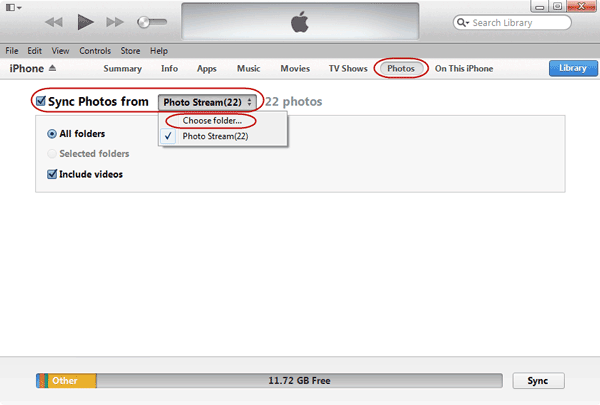
Step 3: Check “Sync Photos from” and after that, click “Choose folder” in the drop-down list.
Step 4: Browse and navigate to the location where photos are saved on computer. These photos are data you want to sync to iPhone. Select photos folder and click “Select Folder”.

Step 5: When you see the selected folder has been appeared after “Sync Photos from”, click “Apply” at the bottom side of iTunes.
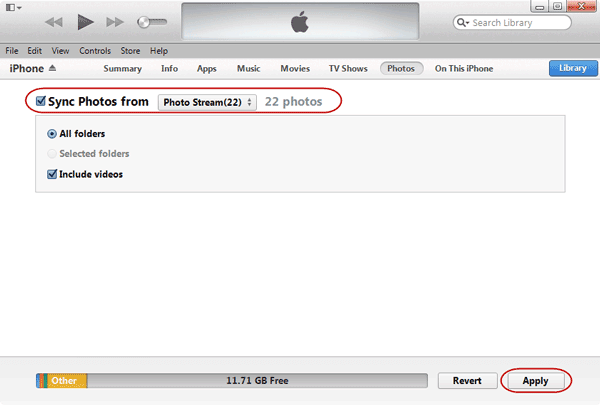
The message on the top of iTunes shows selected photos are synced to your iPhone.

Second Way: Transfer Files on Mac Computer to iPhone with Apps
If you want to transfer files on Mac computer to iPhone, Airdrop is a good choice. AirDrop lets you share photos, videos, websites, locations, and more with people nearby with an Apple device (iOS 7 or later), or Mac computers with OS X Yosemite.
Example: Send files from Mac to nearby Macs and iOS devices with AirDrop
With AirDrop in hand, you can easily send files wirelessly from your Mac to other Mac computers, and with OS X Yosemite, you can also share with iOS devices. Now let’s see how to transfer files from Mac to iOS device with AirDrop.
Preconditions:
- iPhone 5 or later, iPad (4th generation or later), iPad mini, iPod touch (5th generation), Mac computer
- Turn on Wi-Fi and Bluetooth.
- Sign into iCloud account.
Section 1: Send files
You can send files from the Finder on your Mac to other nearby devices and Mac computer using AirDrop.
- In Finder, select Go > AirDrop, or select AirDrop in the sidebar of a Finder window.
- Drag and drop one or more files onto the image of a device you want to send to, that appears in the AirDrop window.
- Click Send.
Section 2: Receive files
If you send files to a device that uses your iCloud account, the files are automatically received by the device. If you send files to someone else, the receiver needs to Accept the transfer to download what you are sending.
To receive files on an iPhone, iPad, or iPod touch, click Accept when you an AirDrop notification.
To view a file you’ve received, open an app that works with that kind of file. For example, you can view word processing documents in Pages, and images in Photos.
You can also send files directly from your apps using the “Share” feature.
- From an app, click the Share button or right-click the item that you want to share.
- Select AirDrop from the menu of sharing options that appears.
- Select the recipient in the Share sheet that appears.
- Click Send.
Related Articles: