We use cookies for personalizing content and ads and providing social media features. Your usage information on our website will be used for social media, advertising, and traffic analytics, or shared with our partners. Clicking "Accept" means you agree to use our cookies .
Most of the people might meet the error that this site can't be reached in Google Chrome especially Windows 10. This may get on your nerves because it didn't work after you have tried to scan the malware or even reinstall your Google Chrome. Worry not: try the following workarounds to troubleshoot one by one.
Way 1: Disable Experimental QUIC protocol Google Chrome
QUIC is a good solution to the various needs facing today's transport and application layers, including more connectivity, security, and low latency. Disable Experimental QUIC Protocol would allow you to access some websites without error.
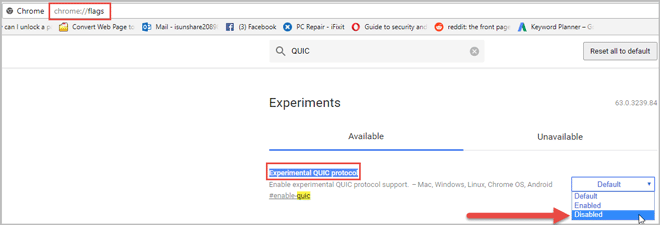
Step 1: Open Chrome, input "chrome://flags" in the URL bar and press Enter.
Step 2: In the Search box below the Menu bar, type QUIC. Click the Down arrow at the end of the line and select Disable.
Step 3: Close Chrome and relaunch to check if it has connected the network.
Way 2: Change the value of TLS 1.3 While site cannot be reached Chrome
The complete spelling of TLS is Transport Layer Security which is used to record protocol to process data encryption.
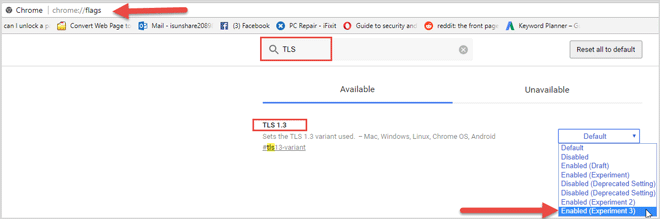
Step 1: In the Chrome URL box, input "chrome://flags" and Enter. Then type TLS in the search bar.
Step 2: Click the Down arrow, select Enabled (Experiment 3) from the option. Once finished, restart your Google Chrome.
Way 3: Restart DNS client on Windows 10
At times, you may get DNS error or DNS server itself problem when networking. Under this situation, you can restart DNS client manually.
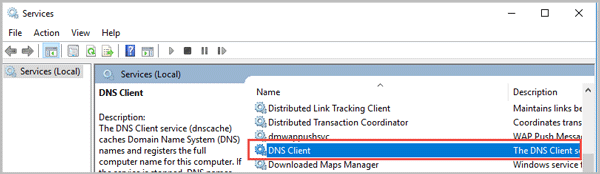
Step 1: Press Windows key + R key. In the Run dialog box, type "services.msc" (Without quote).
Step 2: Once the Service window popups, scroll down and find out DNS Client. Right-click and Restart it.
Way 4: Allow DNS Prediction Google Chrome
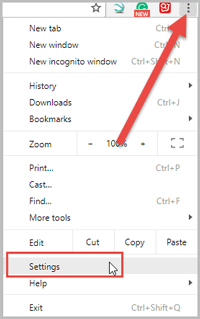
Step 1: Open Google Chrome, click "More" at the top-right corner and select Settings.
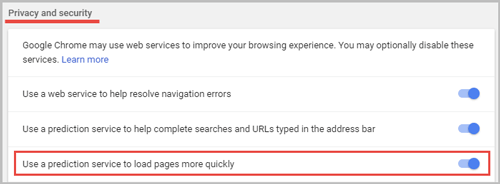
Step 2: At the bottom of the page, expand Advanced. Scroll down and switch the trigger of "Use a prediction service to load pages more quickly" into blue color under Privacy and security section. Thus, DNS Prediction in Google Chrome is allowed.
Step 3: Relaunch Google Chrome and check if it works.
Way 5: Reset TCP/IP stack in Command Prompt
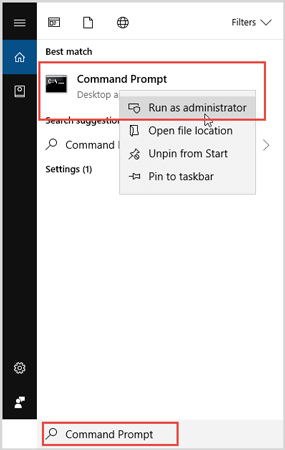
Step 1: In Windows Search Box, input Command Prompt. Right-click and select Run as administrator.
Step 2: Type the following command and press Enter at the end of each line.
ipconfig /release
ipconfig /all
ipconfig /flushdns
ipconfig /renew
netsh int ip set dns
netsh winsock reset
Step 3: Restart your computer after running the command above.
Way 6: Make a change to IPv4 DNS Address
Step 1: Input Control Panel in the Cortana search box and Enter.
Step 2: In the Control Panel window, click the Down Arrow next to View by and select Small icons. Choose Network and Sharing Center on the left first column.
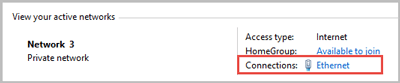
Step 3: Under View your active networks, click on the network next to Connections.
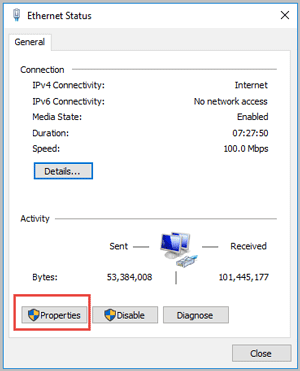
Step 4: In the Status window, click on Properties button as the image below.
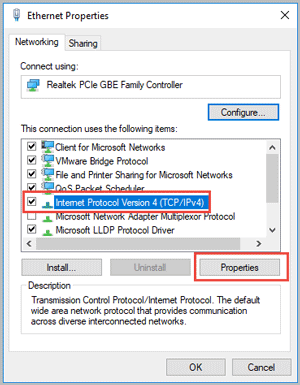
Step 5: In the Properties window, check the box of "Internet Protocol Version 4 (TCP/IP)" then tap on Properties button.
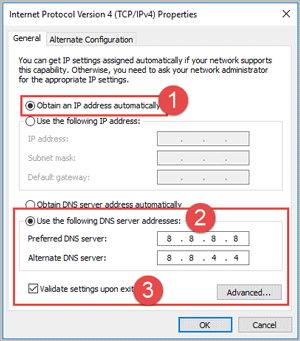
Step 6: Check the option of "Obtain an IP address automatically". Under Use the following DNS server addresses, change the Preferred DNS server and Alternate DNS server value as the following:
8.8.8.8
8.8.4.4
Tick the checkbox of Validate settings upon exit. Tap on OK button. Restart your computer and check if this site cannot be reached error exits Google Chrome.