We use cookies for personalizing content and ads and providing social media features. Your usage information on our website will be used for social media, advertising, and traffic analytics, or shared with our partners. Clicking "Accept" means you agree to use our cookies .
As a new system in the Windows OS family, Windows 11 brings many new features compared to its predecessor. But some old problems still exist in this new OS. One of them is that in Windows 11, hard drives do not show up in File Explorer, and sometimes external drives do not show up after updates. After Windows 11 update, sometimes you can only see the C drive in File Explorer. This can be caused by a variety of reasons, common ones being corrupt system files, faulty Windows updates, hardware problems, outdated or corrupt drivers, etc.
Way 1: Use Disk Management to add drive numbers to partitions to retrieve missing disks
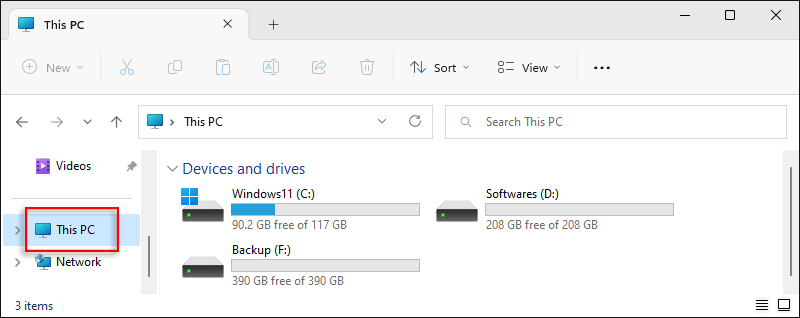
Step 1: Open This PC in File Explorer and you will see that the E drive does not show up under Devices and drives.
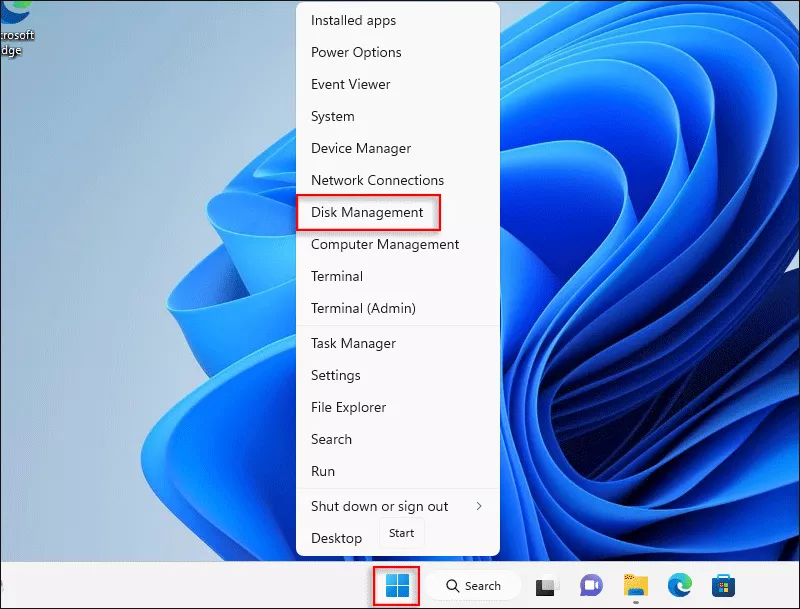
Step 2: Right-click Start on the taskbar to open the menu, then select Disk Management from it.
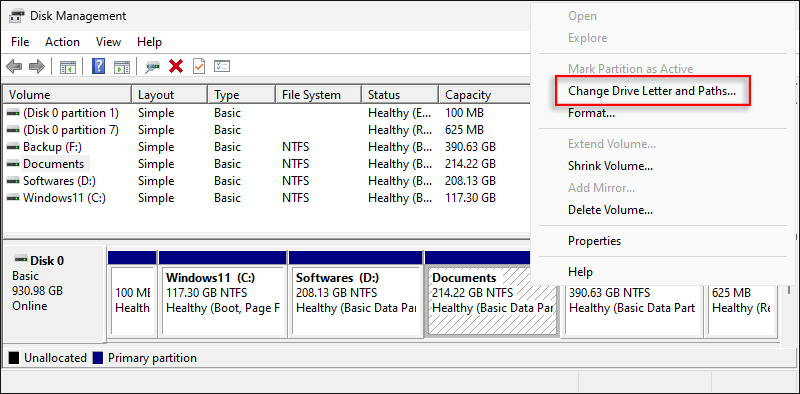
Step 3: Find the Documents partition with the missing drive letter and select it, then right-click to open the menu and select Change Drive Letters and Paths... from it.
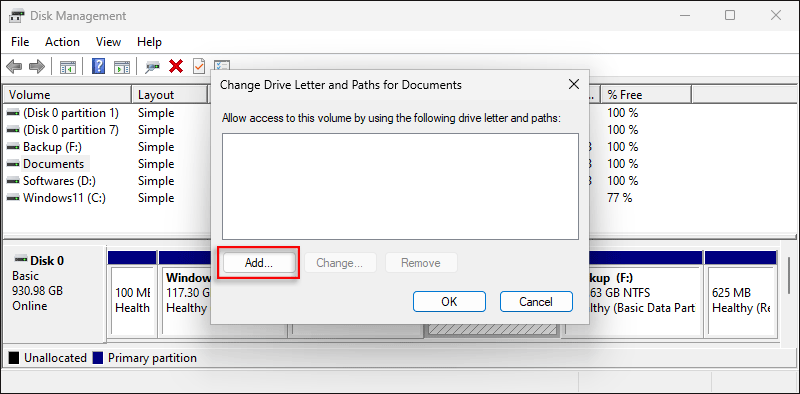
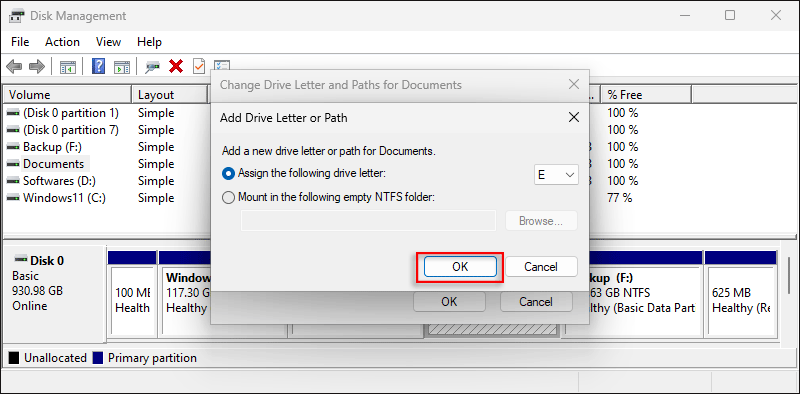
Step 4: Click the Add button in the pop-up window.
Step 5: Click OK to assign a drive letter: E to the Documents partition.
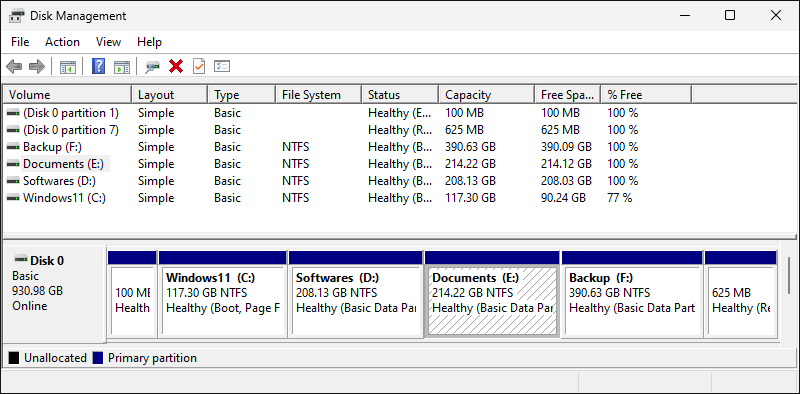
Step 6: This completes the assignment of a drive letter: E to the Documents partition.
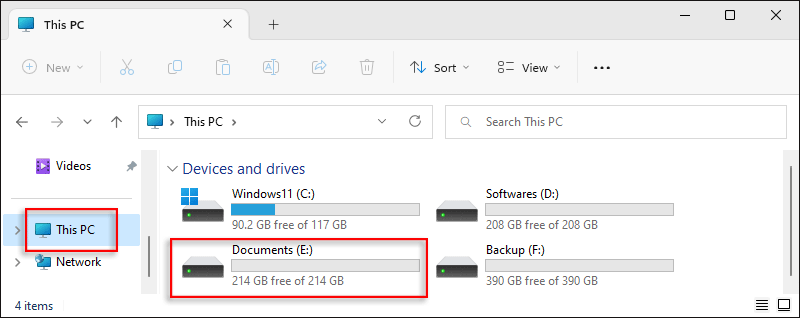
Step 7: Open This PC in File Explorer and you can see that the E drive has been retrieved.
Way 2: Use CMD to add drive numbers to partitions to retrieve missing disks
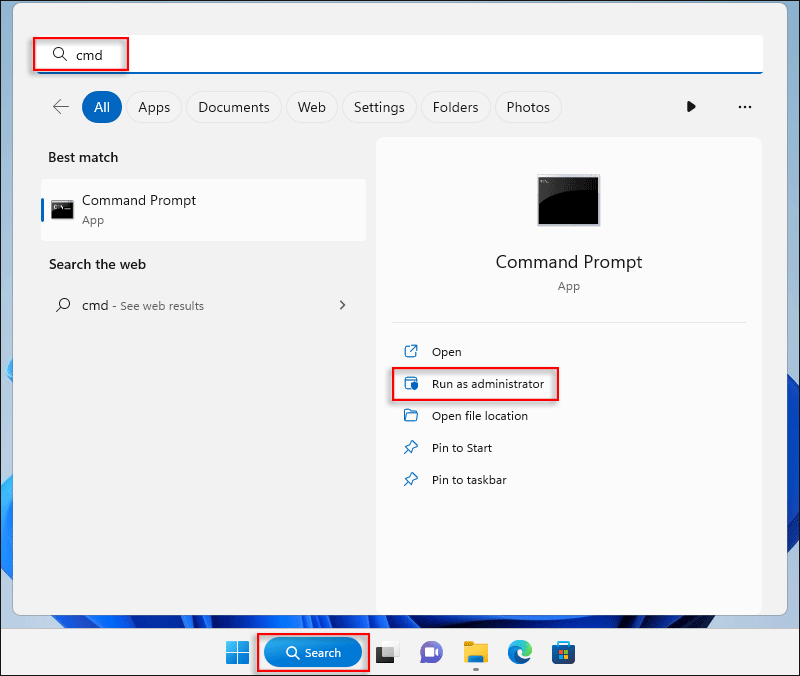
Step 1: Click Search on the taskbar to open the panel, then type: cmd in the search box to search, find Command Prompt and click Run as administrator to open the CMD application window.
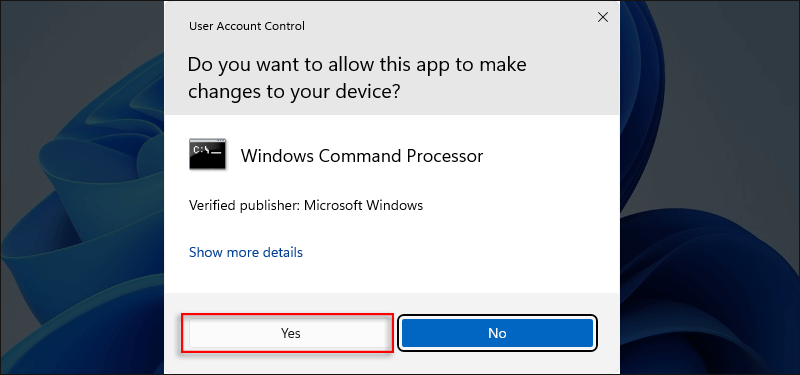
Step 2: In the User Account Control pop-up box: Do you want to allow this app to make changes to your device? Click Yes to continue.
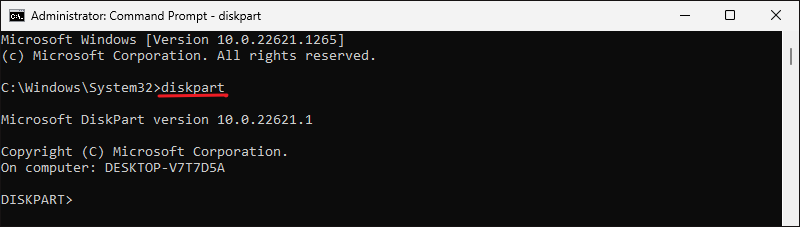
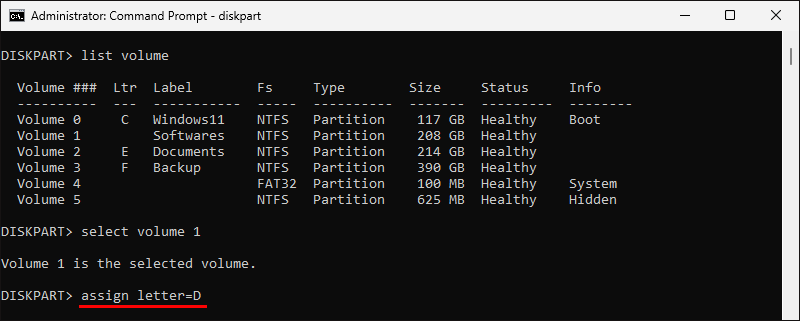
Step 3: Type the command: diskpart and press enter.
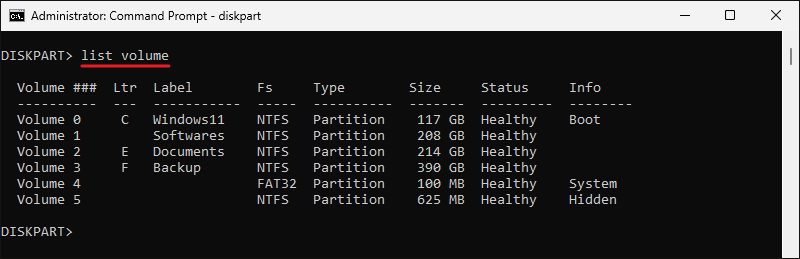
Step 4: Enter the command: list volume and press Enter to list all volumes of the disk. You can see that the drive number of volume 1 has been removed.
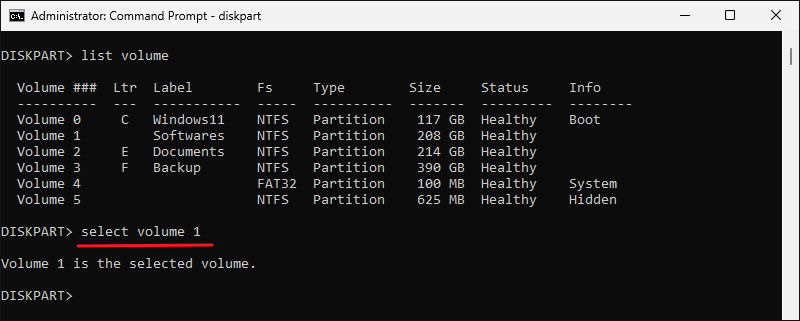
Step 5: Enter the command: select volume 1 and press Enter to select volume 1.
Step 6: Enter the command: assign letter=D Then press the Enter key to set the drive letter of volume 1 to: D.
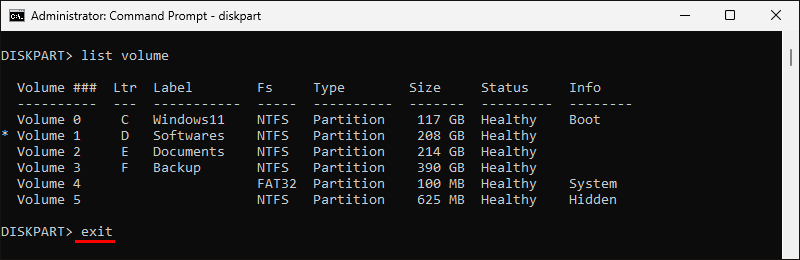
Step 7: Enter the command: list volume and press Enter to list all volumes of the disk again. At this point you can see that volume 1 has been assigned drive number: D.
Step 8: Enter the command: exit and press enter to exit DiskPart.
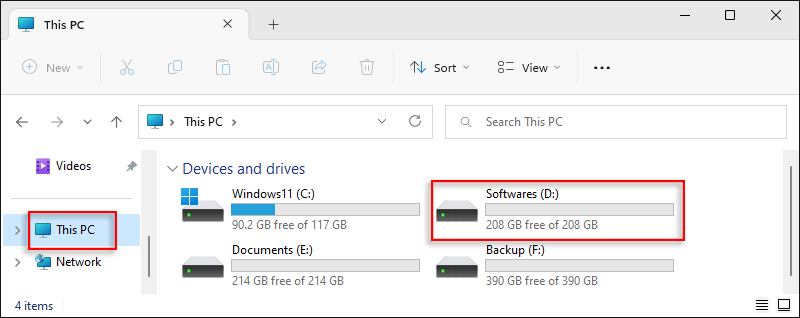
Step 9: Finally, open This PC in File Explorer and you can see that the D drive has been retrieved.