We use cookies for personalizing content and ads and providing social media features. Your usage information on our website will be used for social media, advertising, and traffic analytics, or shared with our partners. Clicking "Accept" means you agree to use our cookies .
Deleting a hard drive partition in Windows 10 can help you manage your storage by removing unnecessary or unused volumes. This process is especially useful when reorganizing your drives or preparing a disk for new data. This article mainly introduces how to delete a manually-added hard drive in This PC on Windows 10 computer.
1. Deleting hard drive will erase all data on it, so do back up the data you want to keep before getting down to delete it.
2. You cannot delete the system partition (usually labeled as C:) while Windows is running. To remove such partitions, you'll need to use external tools or boot from installation media.
Method 1: Delete Hard Drive in Windows 10 Using Disk Management
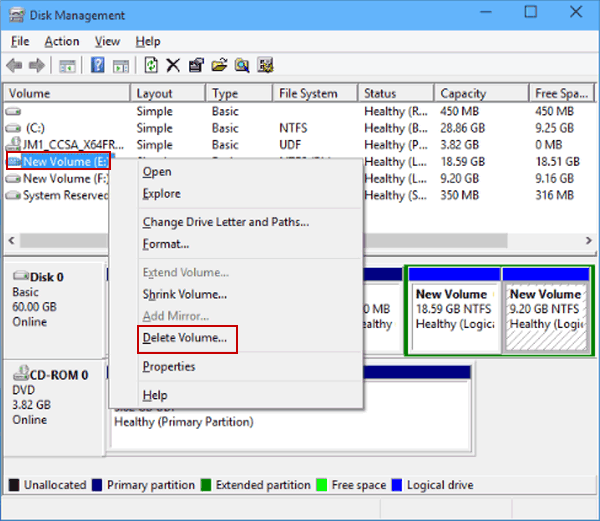
Step 2: Right-click a manually-added hard drive in the list and choose Delete Volume on the context menu.
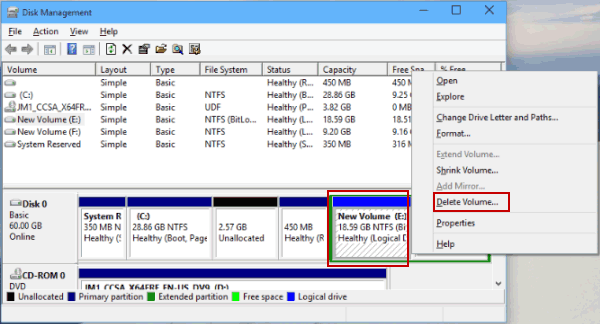
In this procedure, you can also right-tap the manually-created hard drive in the disk info thumbnails and select Delete Volume in the menu.
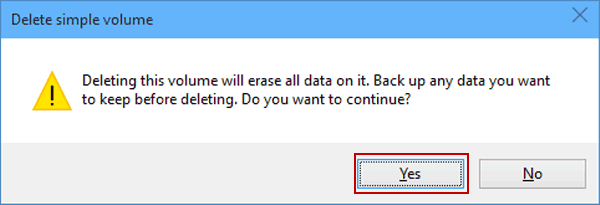
Step 3: Click Yes to confirm deleting this hard drive.
After that, your will get an unallocated space on the disk. Of course, you can create a new simple volume or extend the existing one by using this space.
Method 2: Remove a Hard Drive via DiskPart
For more advanced control, you can use the DiskPart command-line utility to remove the hard drive.
Step 3: Execute the command line: list disk to view all disks.
Step 4: Check which disk contains the drives you are going to delete. Then execute the command line: select disk X.
Step 5: Run the command line: list partition to view all volumes in the selected disk.
Step 6: Execute the command line: select partition Y to select the drive.
Step 7: Type delete partition and press Enter. In no time, your drive is removed from the disk.
Tips: How to Wipe a Hard Drive in Windows 10
If you're planning to dispose of or sell your hard drive, consider securely wiping it to prevent data recovery. iSunshare File Delete Genius can help you to erase all data in the hard drive without recovery. You can free download to have a try.
iSunshare Reliable File/Folder Shred Software
Completely delete your files from a hard drive
Erase files/folders in a drive in an irreversibly way
Support various data and with no limitation on the partitions/disks