We use cookies for personalizing content and ads and providing social media features. Your usage information on our website will be used for social media, advertising, and traffic analytics, or shared with our partners. Clicking "Accept" means you agree to use our cookies .
"My computer works well yesterday. But when I try to log in this morning, I cannot login to Windows 11 with correct password. It won't accept my password. Please help!"
It's frustrating when you enter the correct password on your Windows 11 computer, only to be told it's wrong. Whether you're typing your Microsoft account password or a local account password, this issue can lock you out unexpectedly. Don't worry! In this article, you will learn the exact steps to fix Windows 11 not accepting password issue.
If your keyboard is set to other language or the caps lock is on, the correct password you enter is wrong so that Windows 11 does not accept it. Thus, you need to make sure Caps Lock is off and you are using the correct layout, especially if using special characters.
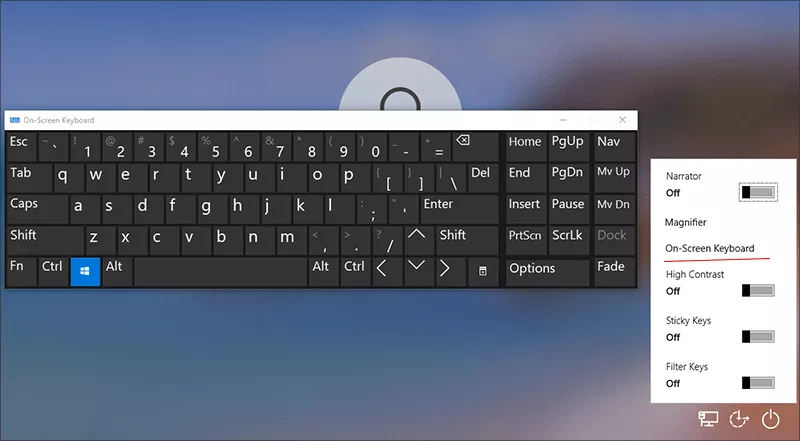
Fix 2: Use the On-screen Keyboard
If there are problems on your keyboard which lead to the password not being accepted, you can turn on the on-screen keyboard and try the correct password. At the login screen, click the Ease of access icon and choose On-Screen Keyboard. Then enter the password manually with a virtual keyboard.
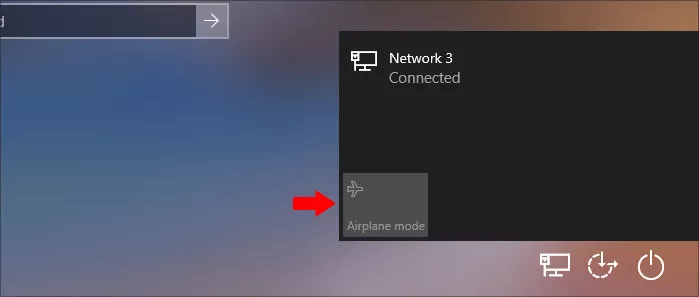
Fix 3: Enable the Airplane Mode
Many users reflected that it helped to solve the issue "Cannot log in to Windows 11 with the correct password" when the Airplane Mode is on. Thus, on the Windows 11 login screen, click the Internet icon on the lower right corner. Then click Airplane mode. After that, restart your computer and try to login again.
Fix 4: Boot into Safe Mode
If Windows 11 not accepting your password, you can try to boot into safe mode. If you successfully enter the safe mode, it can help solve certain issues that prevent normal login. After that, you may login to the Windows 11 as normal.
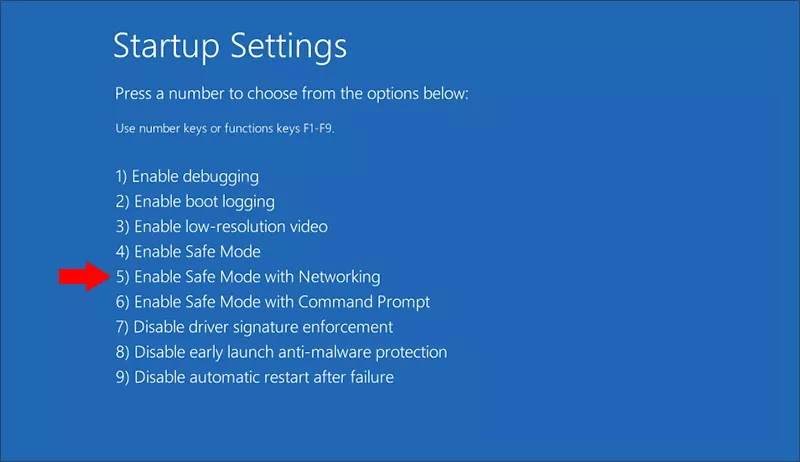
How to enter the safe mode in Windows 11? Click the power icon on the bottom right corner of the login screen and choose Restart. At the same time, keep pressing the Shift key. When your PC enters the Windows Recovery Environment, choose Troubleshoot > Advanced options > Startup Settings and hit the Restart button. Finally, when the PC restarts, select Enable Safe Mode with Networking—press F5 to enter safe mode.
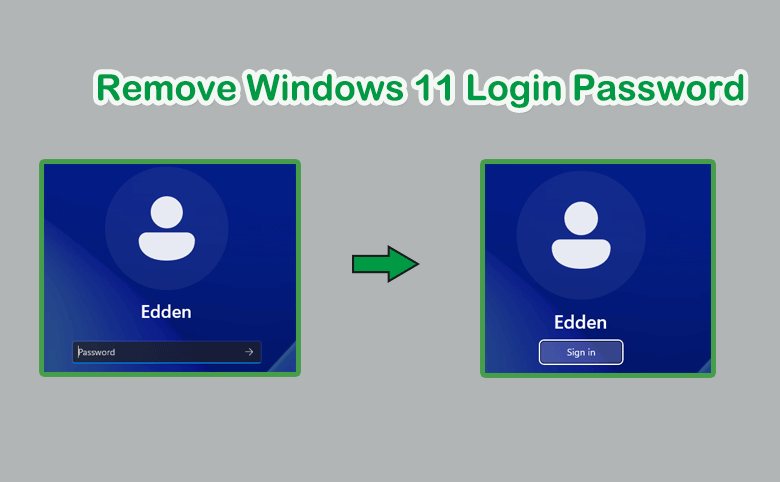
Fix 5: Remove the Windows 11 Login Password
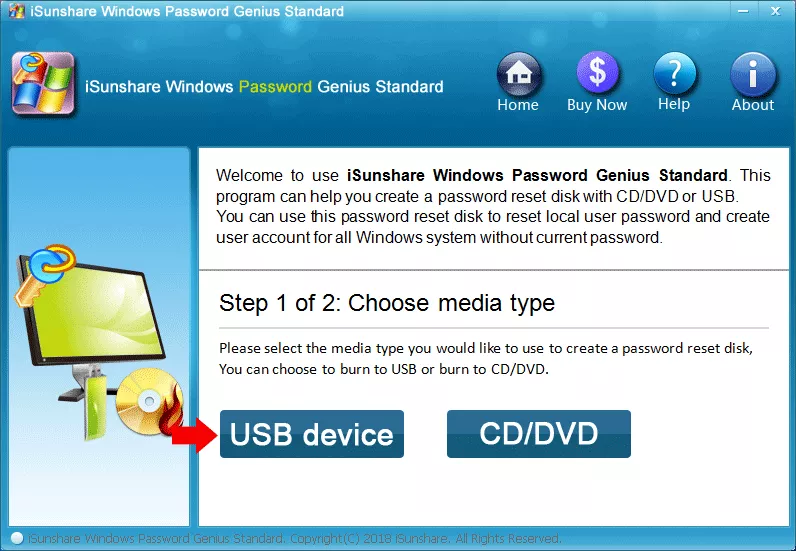
If you need access fast without data loss, try the third-party Windows password remove tool, such as iSunshare Windows Password Genius. With iSunshare Windows Password Genius, you can boot the locked Windows 11 computer from USB and remove the Windows login password, no matter it is for Microsoft account or local account. Finally, you can regain access without data loss.
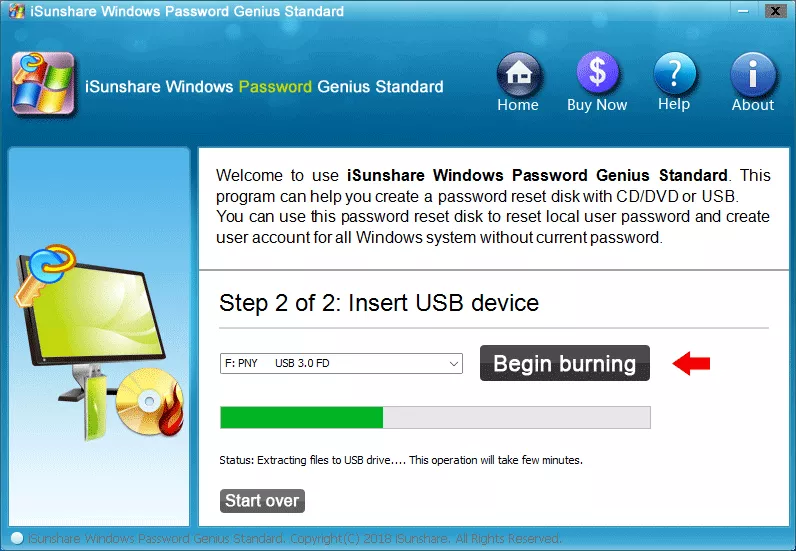
Step 1: Find another working computer and insert a USB disk into the computer. Download and run iSunshare Windows Password Genius, and click the USB device button.
Step 2: Choose the USB drive and click the Begin burning button. Wait for a while and the password reset disk is made.
Step 3: Reject the USB drive from the computer and insert it into your Windows 11 PC. Click the power button on the lock screen and choose Restart. Then, press the boot menu and set the Windows 11 to boot from USB. Once done, your computer will show the iSunshare Windows Password Genius interface.
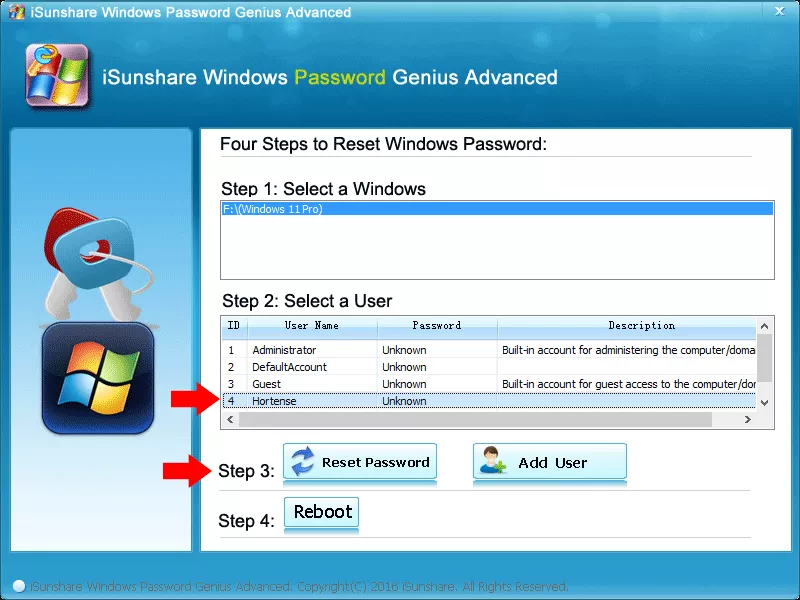
Step 4: Choose your Windows 11 login account and hit the Reset Password button. Soon, your password will be deleted. And now you can click the Reboot button and reject the USB disk to access Windows 11 without requiring the login password.
Fix 6: Roll Back Windows 11 to a Previous Point via System Restore
If you have made the system restore point before the Windows 11 is locked, it deserves trying to roll back Windows 11 to a previous point to fix Windows 11 not accepting the correct password issue.
Step 1: Hit the power button and click the Restart option while keep pressing the Shift key.
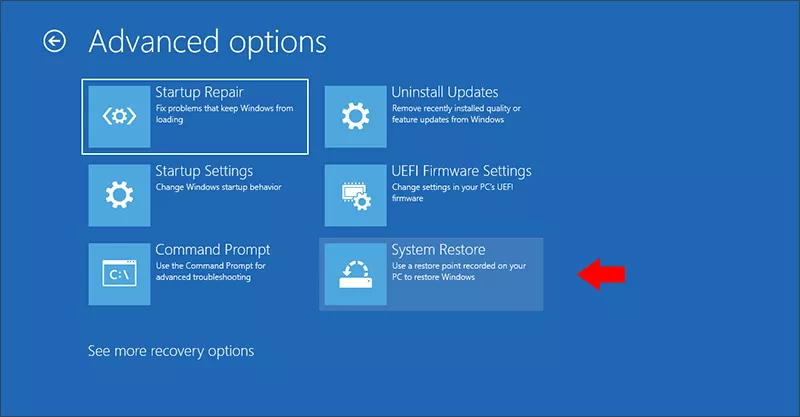
Step 2: Go to Troubleshoot > Advanced Options > System Restore.
Step 3: Choose a restore point before the issue began and follow the onscreen instruction to roll back your Windows 11. If you are asked for the account password, try the next method.
Fix 7: Reset Windows 11 in Windows Recovery Environment
This is the last solution to fix Windows 11 not accepting correct password issue. And if all above methods do not work, you can reset Windows 11 at the cost of all data loss. It is not recommended to do so.
Step 1: On the Windows 11 login screen, click the power button and click the Restart option while keep pressing the Shift key.
Step 2: Choose Troubleshoot > Reset this PC > Remove everything.
Step 3: Follow the onscreen steps to reset Windows 11.
Conclusions
By following the steps in this guide, you can regain access to the Windows 11 computer which does not accept the correct password. It is recommended to keep your login credentials updated and create a password reset disk or recovery option in case similar issues arise in the future.