We use cookies for personalizing content and ads and providing social media features. Your usage information on our website will be used for social media, advertising, and traffic analytics, or shared with our partners. Clicking "Accept" means you agree to use our cookies .
"I don't like to wake up my Windows 11 screen frequently, however, it still locks the screen automatically when I leave my computer for a while. How to turn off the lock screen on Windows 11, is there any method to solve this issue?"
By default, Windows 11 may have the lock screen turned on. Windows 11 users may be annoyed by the fact that the computer automatically locks the screen and sometimes even pops up some ads after the user has been away from the computer for some time. This post will help you out with how to disable the lock screen on Windows 11 in three ways.
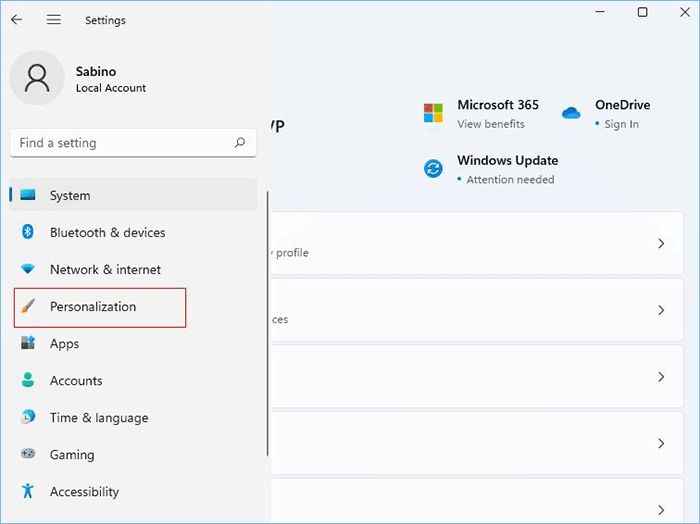
Step 1: Right-click the Start menu from the taskbar and click Settings.
Step 2: Click Personalization on the left sidebar.
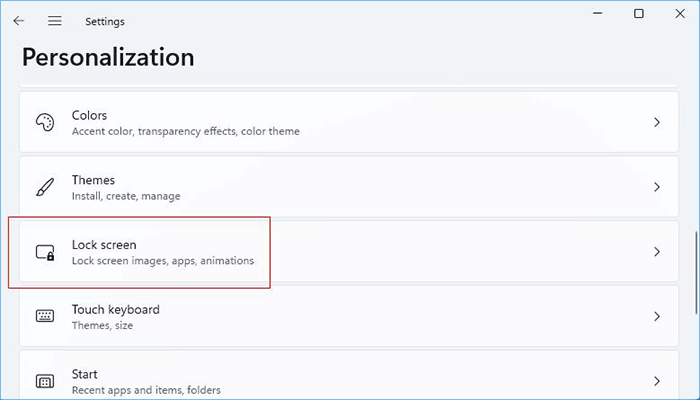
Step 3: In the Personalization, click Lock screen on the right pane. It includes screen images,apps, and animations.
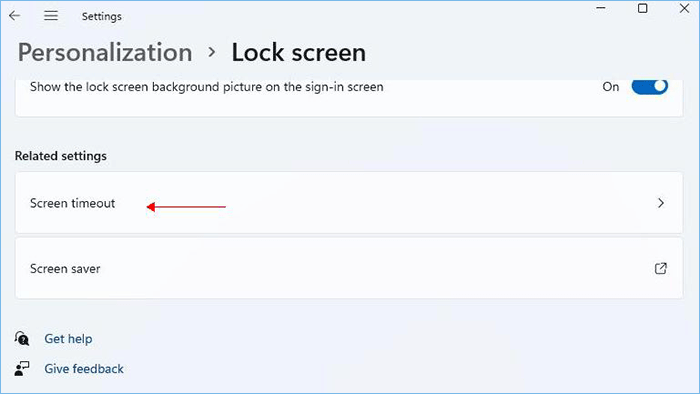
Step 4: Under the Related settings section, click Screen timeout above the Screen saver.
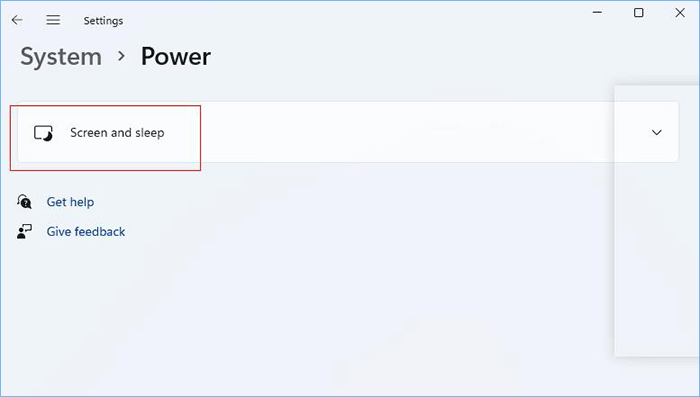
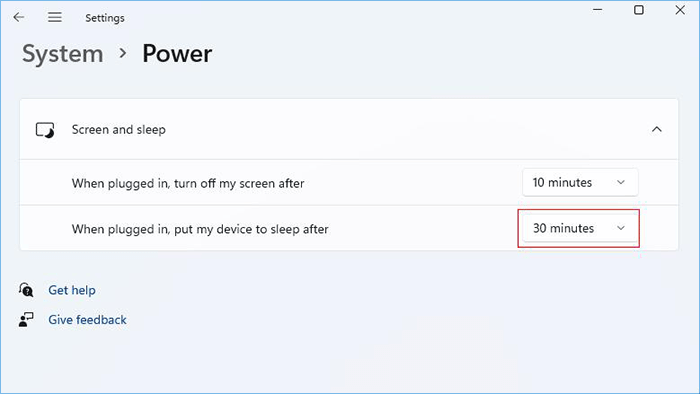
Step 5: Next, hit the Screen and sleep.
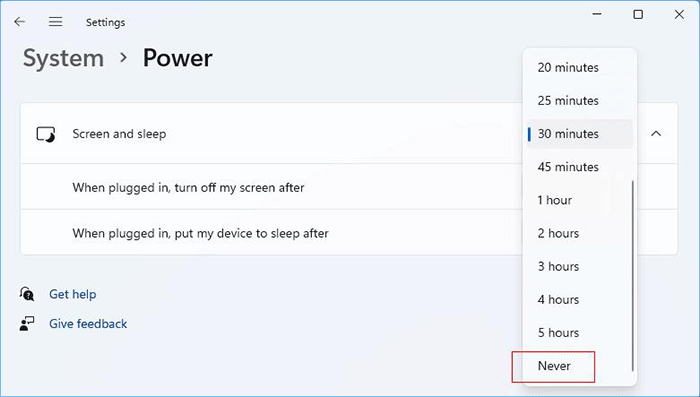
Step 6: Click the drop-down icon next to "When I plugged in, put my device to sleep after".
Step 7: Select Never, which means your Windows 11 PC will never keep a sleep state, as well as you don't need to turn off the lock screen on Windows 11 anymore.
Way 2: Disable Lock Screen with Local Group Policy Editor
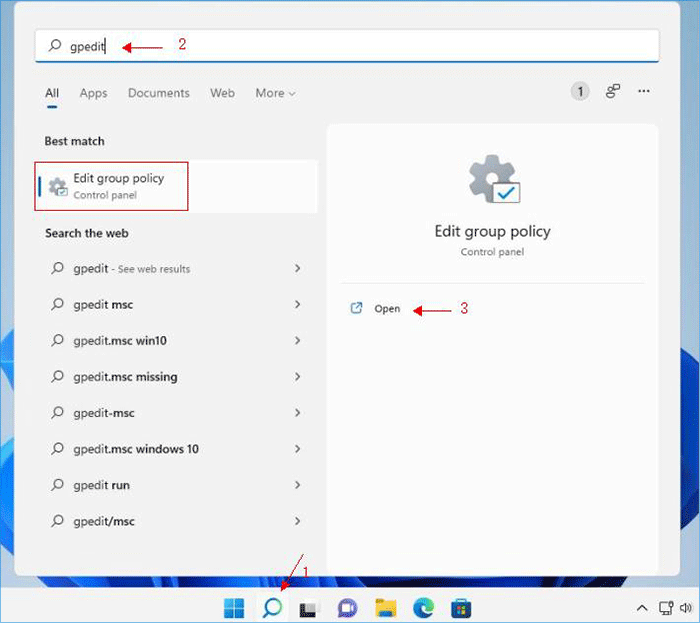
Step 1: Hit the Search icon like magnifying glass from the taskbar. Then enter the command gpedit on the search box to open the Edit group policy.
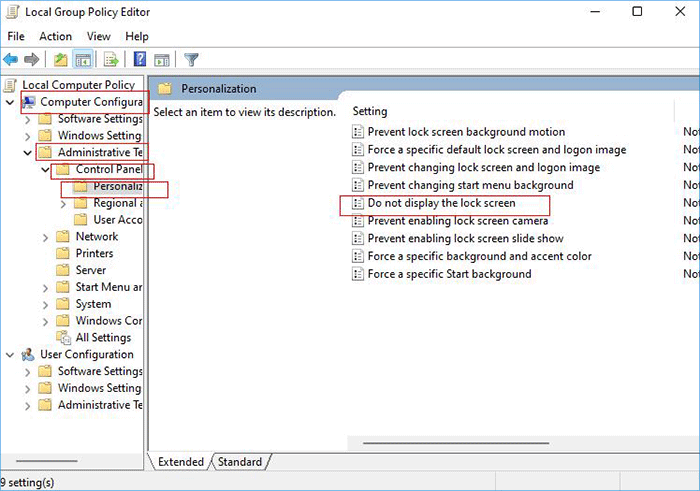
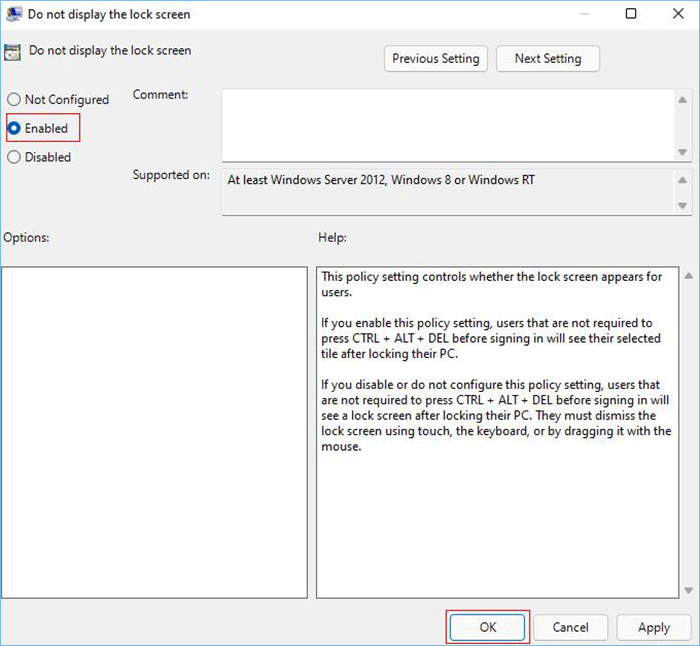
Step 2: In the Local Group Policy Editor screen, tap on Computer Configuration>>Administrative Templates>>Control Panel>>Personalization>>Do not display the lock screen.
Step 3: After double-click on the Do not display the lock screen item, select the Enabled option and click OK to complete.
Step 4: Here you can see the state of Do not display the lock screen has changed to "Enabled". It means you've successfully turned off the lock screen on Windows 11.
Way 3: Disable Lock Screen with Registry Editor
Step 1: Press Win + R simultaneously, type regedit in the Run box and click OK or press Enter key to to bring up the Registry Editor.
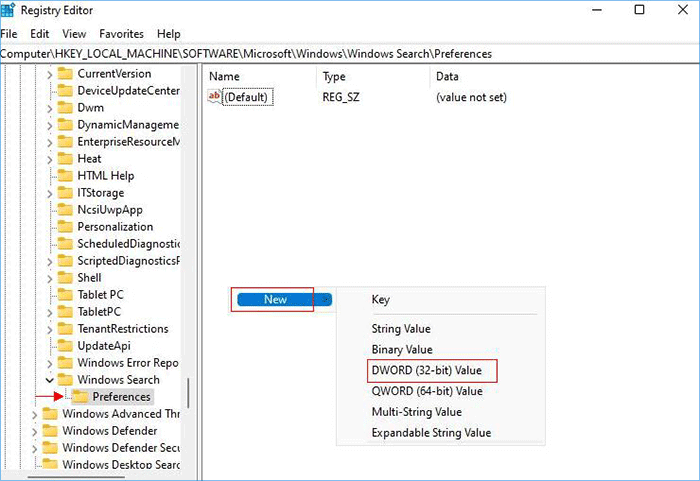
Step 2: In the Registry Editor, hit HKEY_LOCAL_MACHINE>>SOFTWARE>>Microsoft>>Windows. In the right pane, right-click to create a new folder.
Step 3: Rename the new folder as Personalization in the left-hand sidebar.
Step 4: Continue to right-click your mouse in the right pane, click New and click DWORD(32-bit) Value.
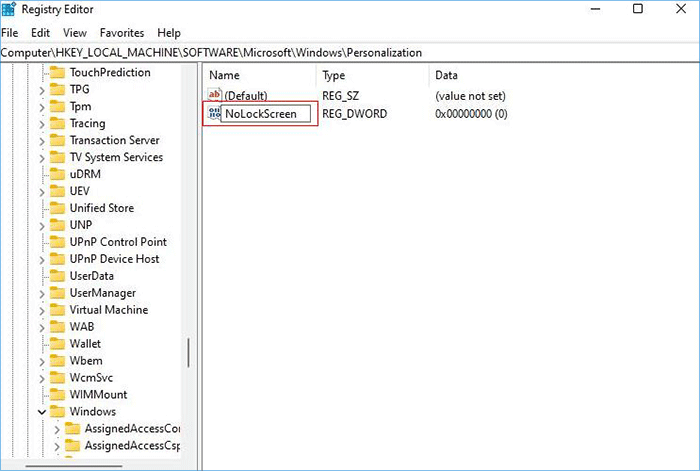
Step 5: Next, rename it as NoLockScreen and double-click it later.
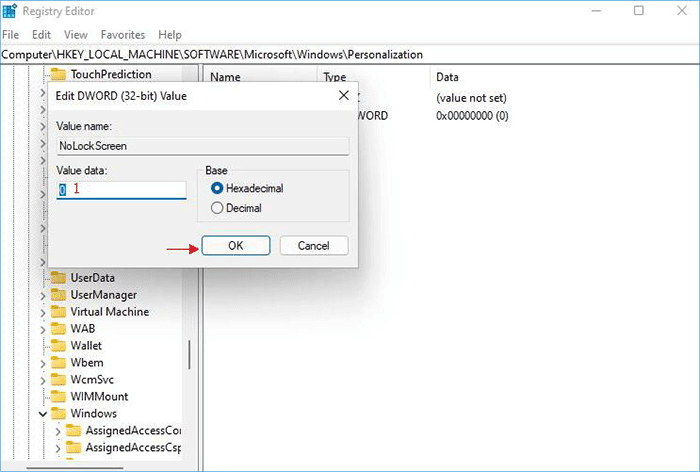
Step 6: Then an Edit DWORD (32-bit) Value dialog box pops-up, change the number of Value data to "1" inside the box. After that, click OK to complete. This is how to disable lock screen on Windows 11 with Registry Editor.
This post is dedicated to working for Windows 11 users to disable the lock screen in Windows 11. Hope the methods mentioned above could clear your confusion.