- For personal owner of Dell Server, lost server data may just lead to some important data disappearance.
- For corporation, losing data might be serious, because the data are related to the business of corporation.
No matter who it is for, data recovery seems to be so necessary. So when there is no backup for restoring lost server data, recover dell server lost data with tool will have to be done. In the following passage, iSunshare BitGenius will be introduced for dell server data recovery.
Dell Server Lost Data Recovery Effectively with iSunshare BitGenius
iSunshare BitGenius is a super powerful data recovery tool that allows you to recover lost data lost because of hard drive partition, format, virus attack, or accident deletion. It can run on Windows computer or server.
Now let’s prepare something first before lost dell server data recovery.
1. Accessible Dell Server.
If Dell server is locked with forgotten administrator password, reset Dell administrator password first and then enter it successfully.
2. Download and install iSunshare BitGenius on Dell Server.

When all of above have been done, please be ready to recover lost data for dell server.
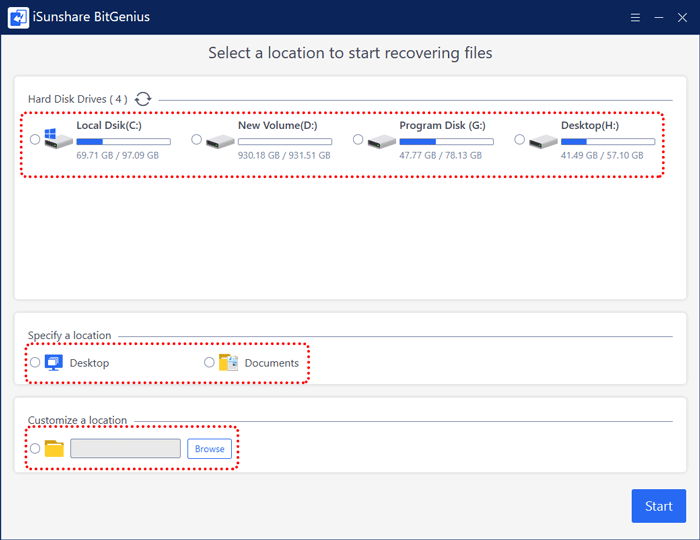
Step 1: Open this tool. Select the location of lost or deleted data. The location can be a partition or desktop. You can also customize the location to be a specific folder.
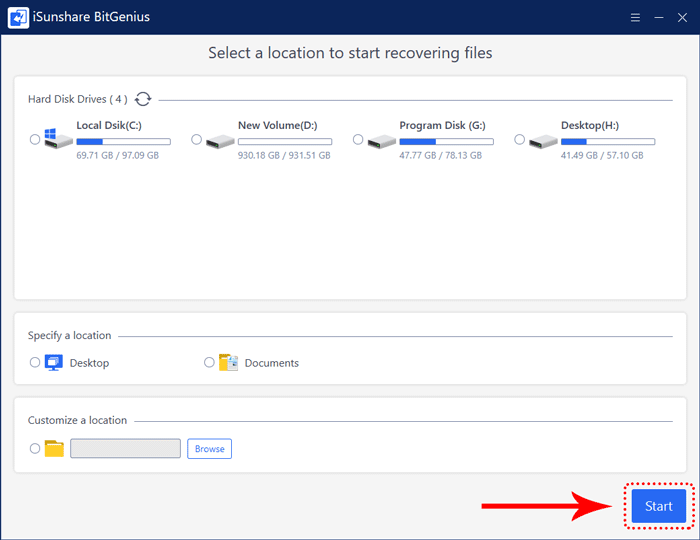
Step 2: Click Start button on the bottom right of interface. Then the tool will conduct a quick scanning firstly and then deeply scan the location again. It may take some time and you need to wait patiently.
Step 3: Once the scanning is finished, all the lost or deleted files in the selected location will be displayed on the interface. On the left pane, you can see the directories of the selected location, you can navigate to the directory of lost or deleted files. Then you can see all the lost file on the right pane.
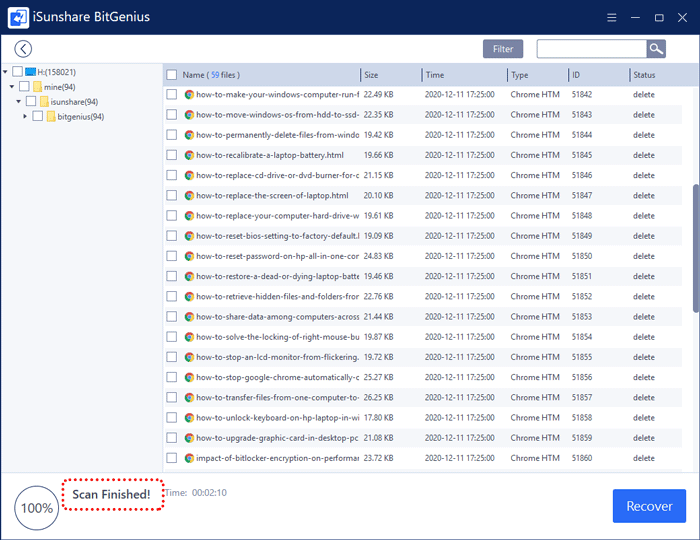
Tips: If you cannot see the lost files in the location where it is lost, you can go to the lost_dir folder to find them.
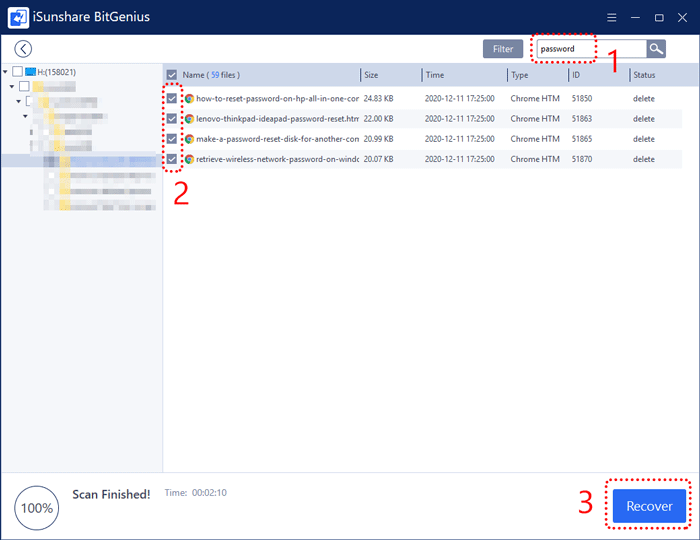
Step 4: In order to make it easier to find out the lost files from the scanning result, this tool offers the features of filtering and searching. Click the Filter button. On the popup window, you can set the file type, size and time to narrow the scope of retrieving files. Then click Apply button. The lost files that match the conditions will be shown on the right pane. Finally, you can check the lost files that you want to restore and click Recover button to restore them.

Alternatively, you can use the feature of searching to find out the lost or deleted files from the scanning result. Type the name or some characters of the file in the searching box and click search button. Then you can reach the lost files more easily. Check the lost files that you want to recover and click Recover button.
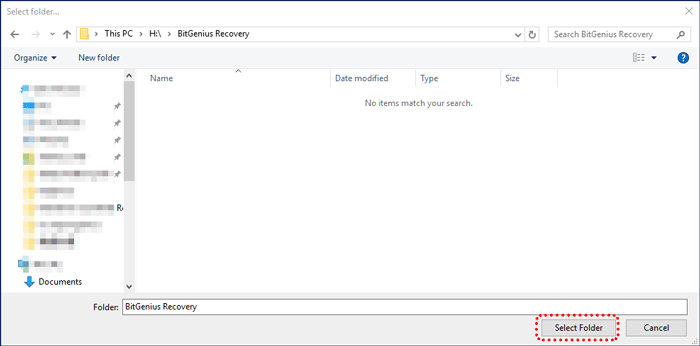
Step 5: After clicking Recover button, select the destination of recovered files.
Step 6: Once the data is recovered, a prompting box will pop out and you can click Yes button to check the restored files instantly or not.
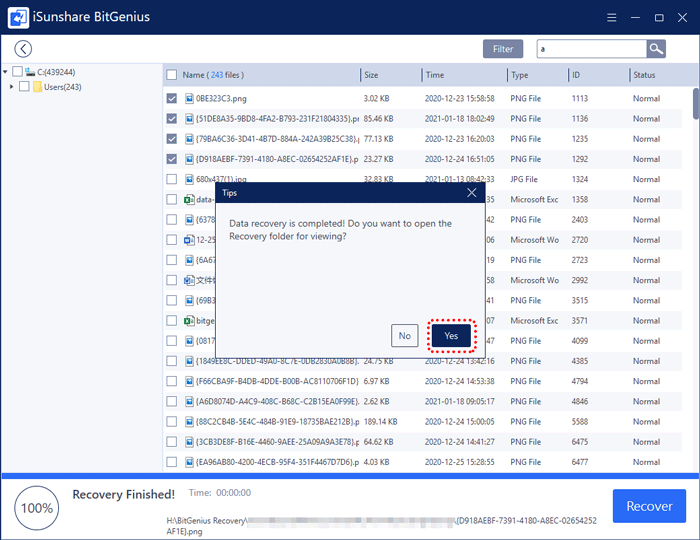
In the end, the lost or deleted files in Dell server is recovered successfully.
Related Articles:
- Measures to Prevent Data Loss after Hard Disk Formatting
- How to Restore Encrypted Data from iTunes to iPad
- Cell Phone Data Recovery | Recover Android Phone and iPhone Lost Data
- How to Recover Domain Admin Password on Windows Server 2008 of Dell Computer
- Dell Administrator and BIOS Password Reset on Laptop/PC