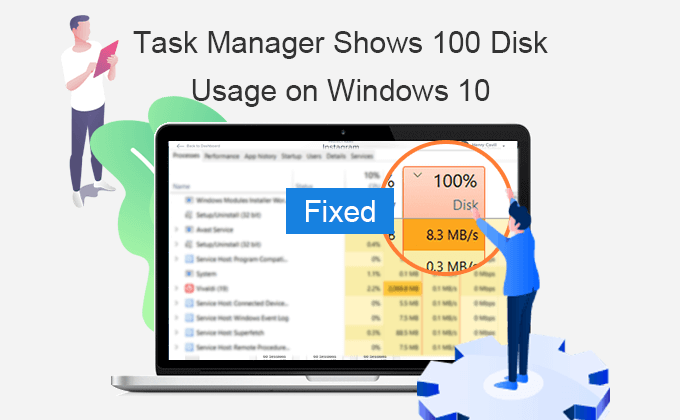
When you get to know that Task Manager shows 100 disk usage on Windows 10, what will you do to solve this 100% disk usage issue? You will get the tutorial here: how to fix 100% disk usage on Task Manager Windows 10.
- Solution 1: Perform a Simple Restart
- Solution 2: Run a Scan for Virus
- Solution 3: Update Windows 10 to Newest Version
- Solution 4: Turn Off Superfetch Service
- Solution 5: Clean up Your Computer
- Solution 6: Execute a Disk Check
- Solution 7: Replace Your Hard Disk with a Larger One
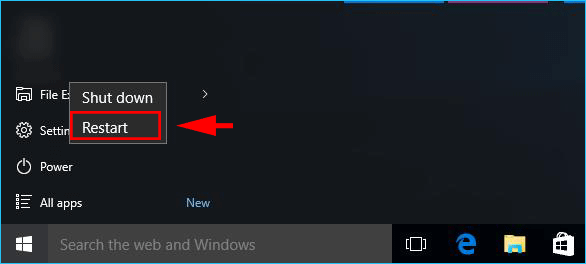
Solution 1: Perform a Simple Restart
Sometimes, the simple restart can help to solve computer issues when the computer screen stuck or mouse cannot move. When it comes to 100% disk usage problem, you can also restart the Windows 10 computer/laptop to check whether it works or not. If not, go ahead to read other solutions.
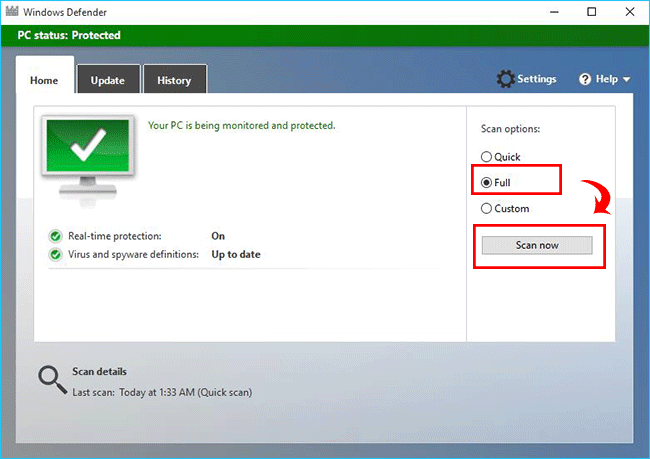
Solution 2: Run a Scan for Virus
In general, when there is a virus on your computer, your system will run into a variety of situations, such as 100% disk usage and Windows OS running extremely slow. At this time, it is necessary to do an overall scan for your Windows 10. You can use the build-in software Windows Defender or the paid utility, such as Bitdefender, to scan the entire hard drive and check whether there is a virus attacking. Be patient and you will get the result in the end.
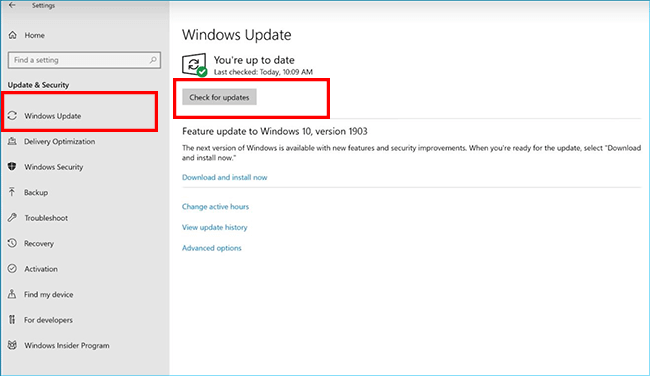
Solution 3: Update Windows 10 to Newest Version
Microsoft makes its great efforts to improve the Windows performance so that it updates the Windows system from time to time. The newest update may help solve the high disk usage issue. You can update the Windows 10 to the latest version manually: click the Start Windows icon and then click Settings > Update & Security > Windows update; after that, if there is a new update available, you can install it and restart the computer.
Solution 4: Turn Off Superfetch Service
Superfetch helps to maintain and improve system performance over time. Also, it plays an important role in decreasing Windows boot time. But it sometimes will cause the high disk usage in Windows 10. You can disable Superfetch service to fix Task Manager 100% disk usage error.
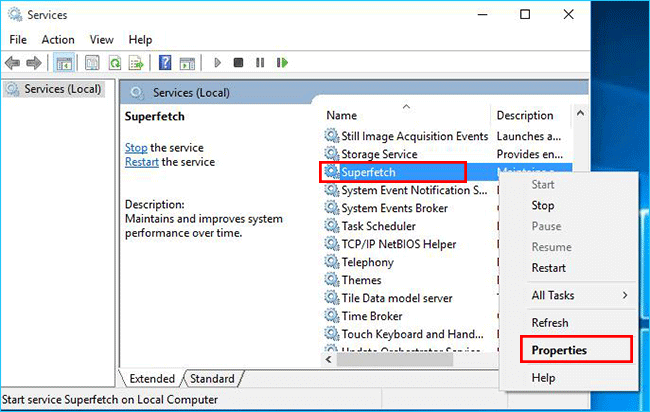
Step 1: Press Windows + R and get the Run box. Then you can enter “services.msc” in the box and press Enter key on the keyboard.
Step 2: In the Services interface, find Superfetch service and right-click to select Properties.
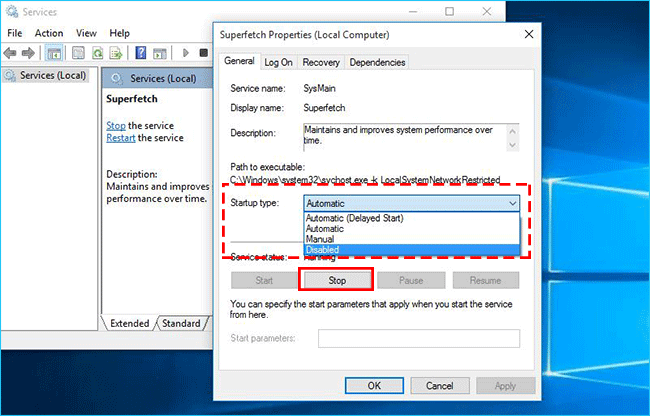
Step 3: Change the Startup type to Disable and click the Stop button. Then in no time, the Superfetch service is turned off.
Solution 5: Clean up Your Computer
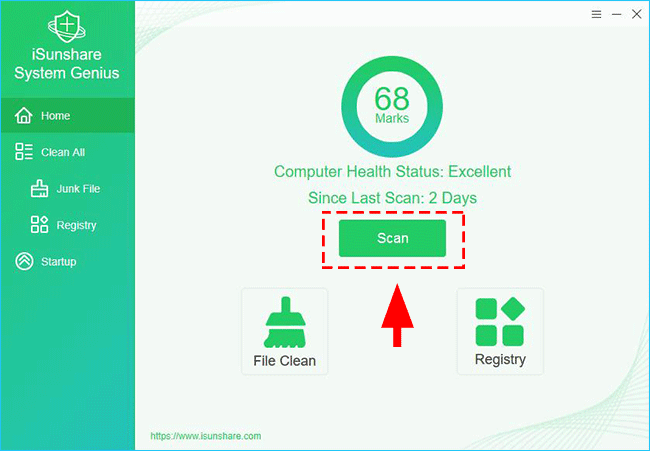
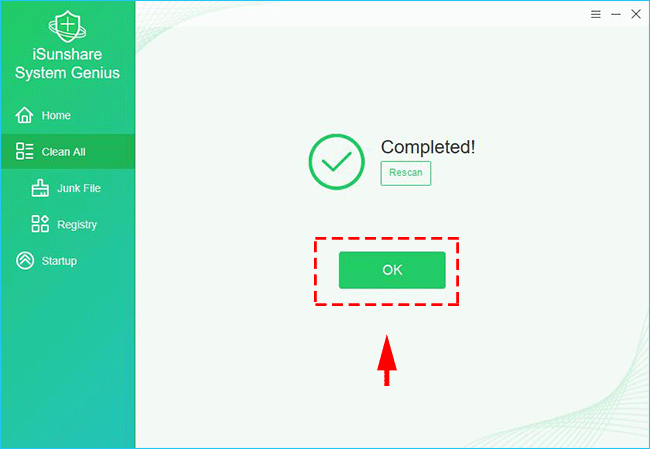
Why not clear up the computer junk files and invalid registry entries? It is a fast way to reduce disk usage. iSunshare System Genius provides you with the Clean All feature, which can help you to free up space within a few clicks. You can free download to get more usable disk space now.
Step1: Launch iSunshare System Genius and click “Scan” to run an overall scan for your Windows 10 computer.
Step 2: Click “Clean” and this software will delete all detected junk files and registry.
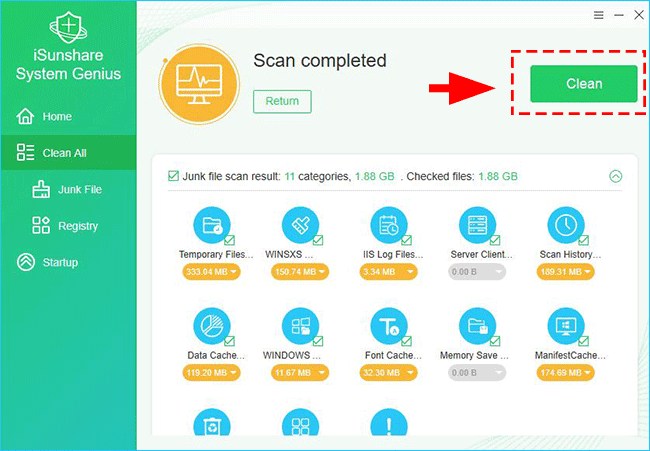
Step 3: The cleaning process ends and you get more space on disk successfully.
Solution 6: Execute a Disk Check
It is necessary for you to do a disk check to find out whether there is an error on your hard drive, which will lead to the 100% disk usage. You can use command lines to conduct this process.
Step 1: Run command prompt as administrator.
Step 2: Enter the command: chkdsk.exe /f /r and press Enter.
Step 3: If the volume is not in use, it will check your system immediately. But if you get the screen like the below one, you can type Y to confirm the next time check when the system starts.
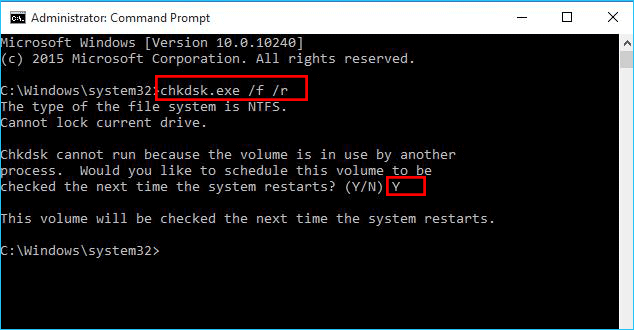
Attention: When you start the Windows 10 next time, the boot time will be longer as it needs time to do the disk check. Or if you are afraid of forgetting this disk check, you can close the applications and restart the computer now.
Solution 7: Replace Your Hard Disk with a Larger One
If you always get 100% disk usage error and the above solutions cannot settle the issue obviously, you can consider upgrading the hard drive. But before you make this decision, it is better for you to consult the professional friends for the hard drive issue. Although you will not lose any data, it is still a large project for the beginners.
iSunshare CloneGo can help to replace the hard drive with a new one without reinstalling Windows 10, even all data in the original hard disk can be moved to the new one.
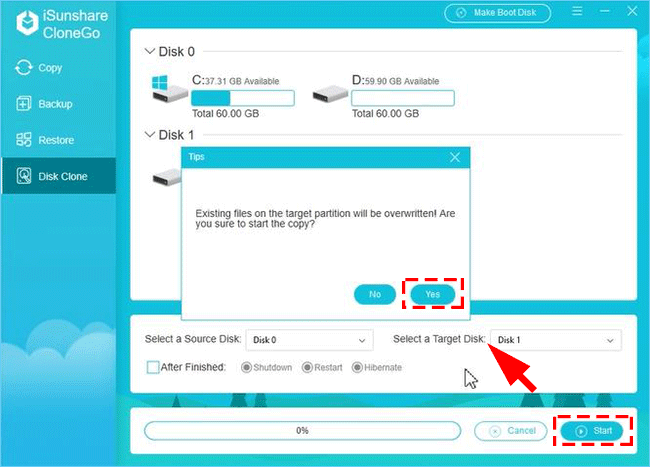
Step 1: Get this software on your Windows 10 computer. Also, connect the alternative hard disk to the computer. You need to initialize the new hard disk immediately and add one volume to the new HDD/SSD.
Step 2: Run iSunshare CloneGo and select Disk Clone option. Then you can select the source disk (Your computer original disk) and target disk – the larger new HDD/SSD.

Step 3: Click the Start button and the program warns it will wipe all data on the target partition. If this is the new hard disk, you can click the Yes button to go ahead.
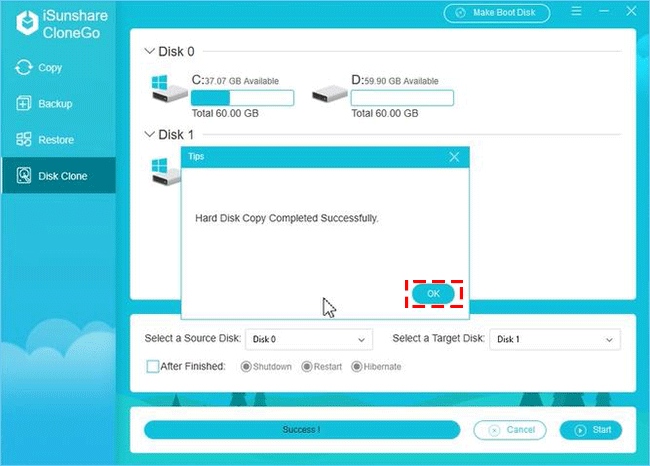
Step 4: When you get the successfully prompt, you can click OK. Then, the disk cloning is finished and you can replace the old hard drive with the new one without reinstalling Windows.
Final Words:
You can adopt one or more solutions above to get the 100% disk usage error in Task Manager solved. Also, you should not do these operations when you get into 100% disk usage trouble:
- Turn off Window Defender or anti-virus software
- Change the Page File Values
- Disable Windows Search Services
- Stop the BIT Services
Related Articles: