We use cookies for personalizing content and ads and providing social media features. Your usage information on our website will be used for social media, advertising, and traffic analytics, or shared with our partners. Clicking "Accept" means you agree to use our cookies .
"My iPhone 14 is stuck in the boot loop, can I fix the boot loop for iPhone?"
Have you ever encountered a situation where the Apple logo on your iPhone appears for a few seconds, then suddenly disappears and reappears repeatedly? This is a common issue known as a boot loop, where your iPhone gets stuck in an endless cycle of restarting. Fortunately, there are several methods you can try to fix this issue. This article provides a comprehensive guide on how to resolve an iPhone stuck in a boot loop.
Jailbreaking allows you to download apps and perform functions not available through the App Store. However, it also makes your iPhone more vulnerable to malware attacks, which can lead to a boot loop.
2. Failed Software Update
If the process of updating your iOS is interrupted unexpectedly, it can cause your iPhone to get stuck in a boot loop. Even after the update is completed, your phone may still encounter this issue.
3. Unstable connection
An unstable connection between your iPhone and computer during an update or data backup with iTunes can also cause your device to become stuck in a boot loop.
4. Screen or Battery Replacement
Some users have reported that their iPhones began to experience boot loops after a screen or battery replacement, indicating that hardware changes can trigger this problem.
Fix 1: Use iOS Repair Genius(Recommend)
iSunshare iOS Repair Genius is a powerful tool designed to fix common system issues such as boot loops, black screens, and being stuck on the Apple logo. It is compatible with all iOS versions and devices, including the latest iOS 18 and iPhone 15. Here's how to use it:
Note: Before using this software, you should make sure that iTunes is the latest version.
Step 1: Download and install iOS Repair Genius on your computer.
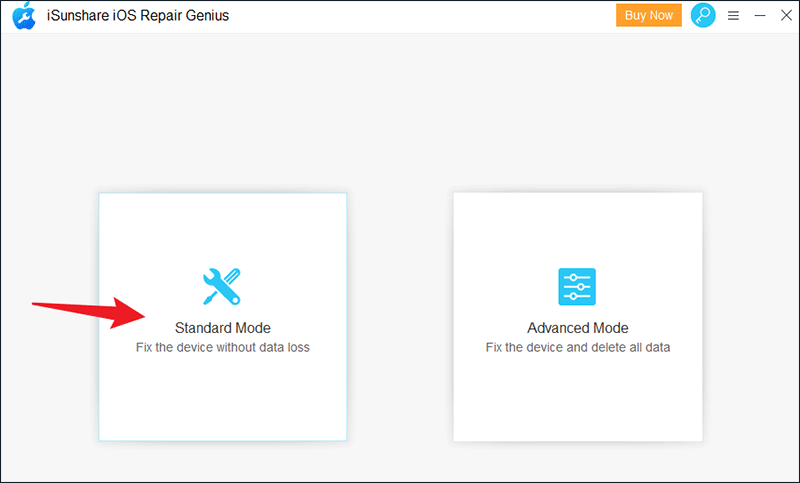
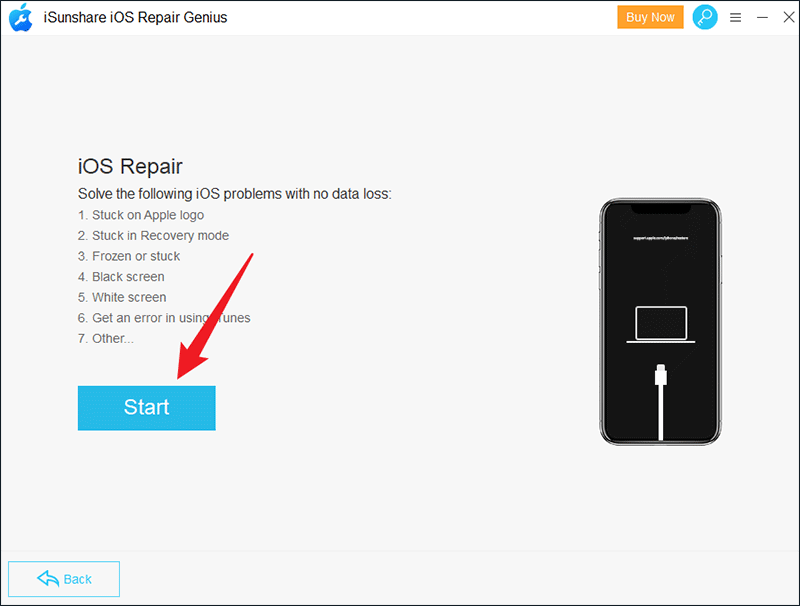
Step 2: In the main screen of the software, click iOS Repair, then choose between Standard Mode (no data loss) and Advanced Mode (which deletes all data). We recommend using Standard Mode.
Step 3: Hit Start button to proceed.
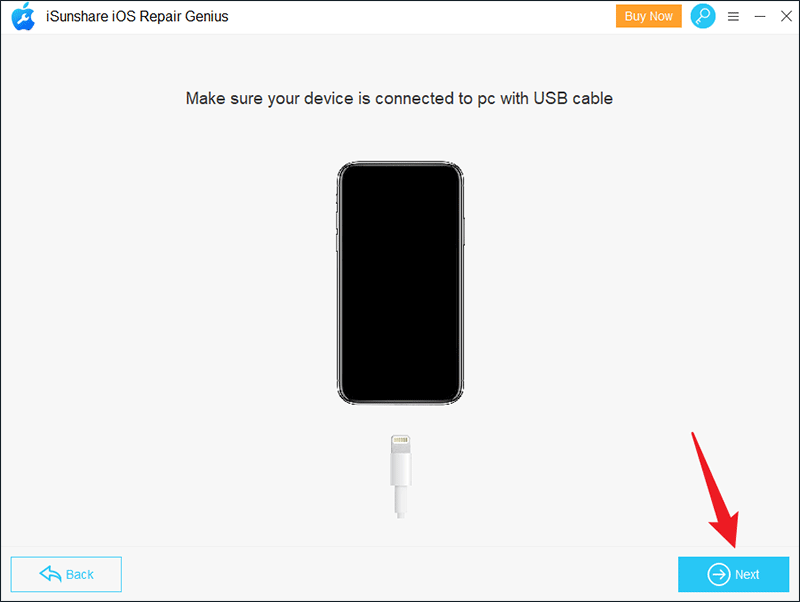
Step 4: Ensure your iPhone is connected to your PC via USB, then click Next button.
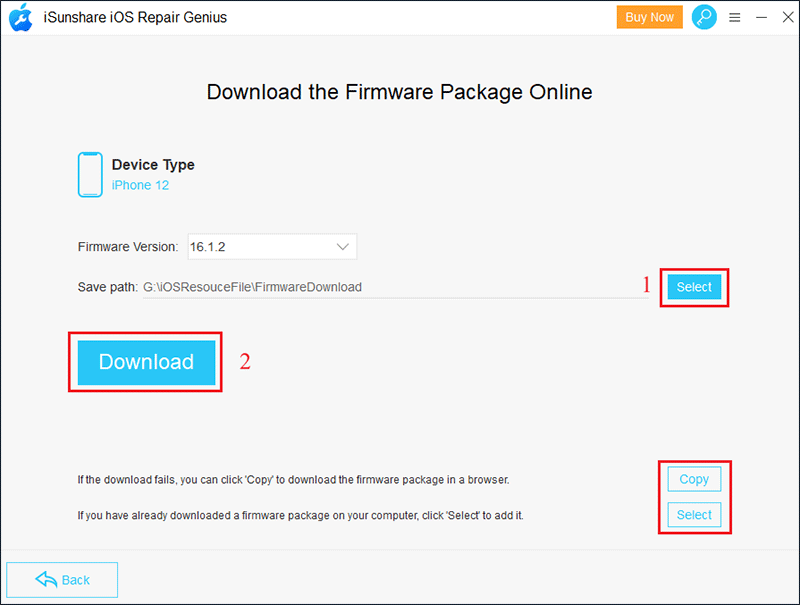
Step 5: The software will identify your device and show the latest firmware version available. Choose a location to save the package and click Download. If the download fails, you can manually download it and then import it using the Select button.
Step 6: Wait for firmware verify.
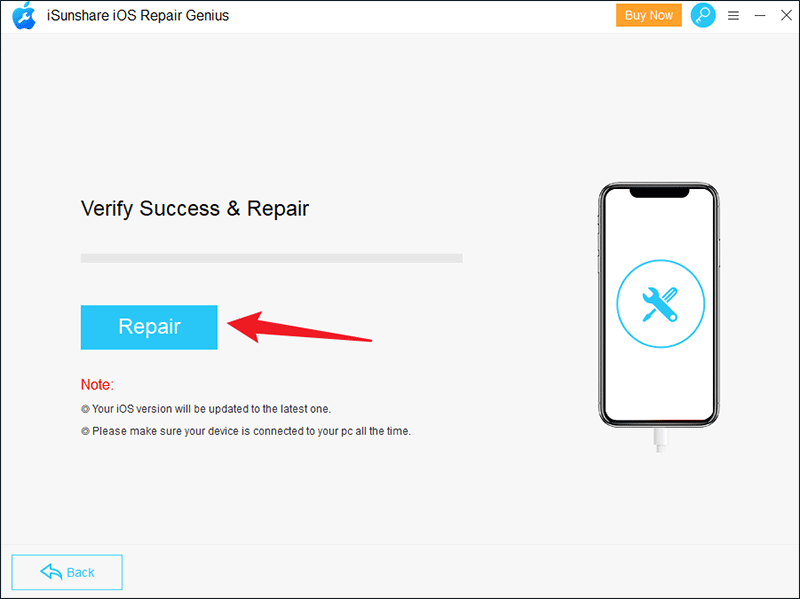
Step 7: Once the firmware is verified, click Repair to start the process.
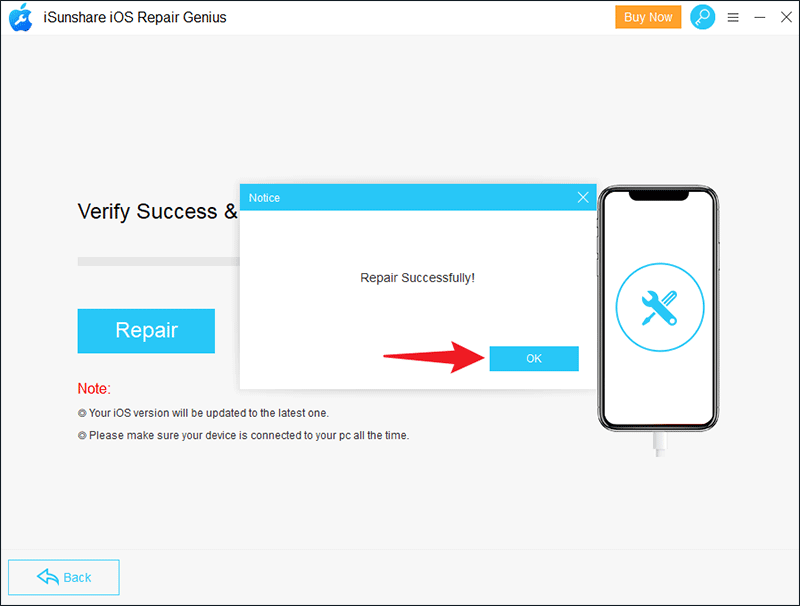
Step 8: Wait for the repair to complete. A window will pop up indicating that your device has been successfully repaired. Your iPhone should now boot up properly.
Fix 2: Fix iPhone boot loop with forced reboot
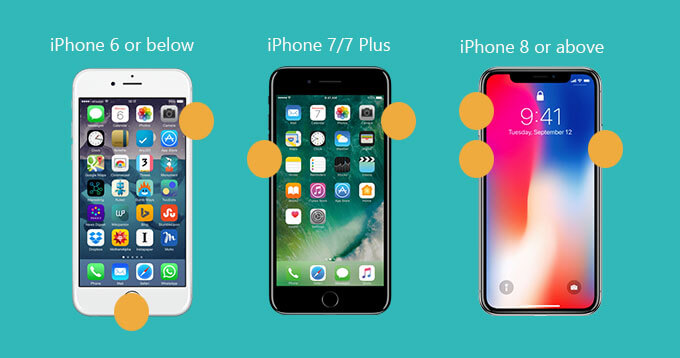
Rebooting your iPhone can often resolve minor issues, including boot loops. The steps vary depending on your iPhone model:
For iPhone 6s/6 and earlier: Press and hold the "Home" and "Power" buttons simultaneously until the screen goes black. Release the buttons, then press and hold the "Power" button until the Apple logo appears.
For iPhone 7 and 7 plus: Press and hold the "Power" and "Volume Down" buttons at the same time until the screen goes black. Release the buttons, then press and hold the "Power" button until the Apple logo appears.
For iPhone 8, iPhone X, iPhone XS, iPhone XR, iPhone 11/12/13/14/15: Press and release the "Volume Up" button and repeat the action of the "Volume Down" button. Then press and hold the "Power" button and wait for the Apple logo to appear. Finally, enter your passcode to boot up your iPhone.
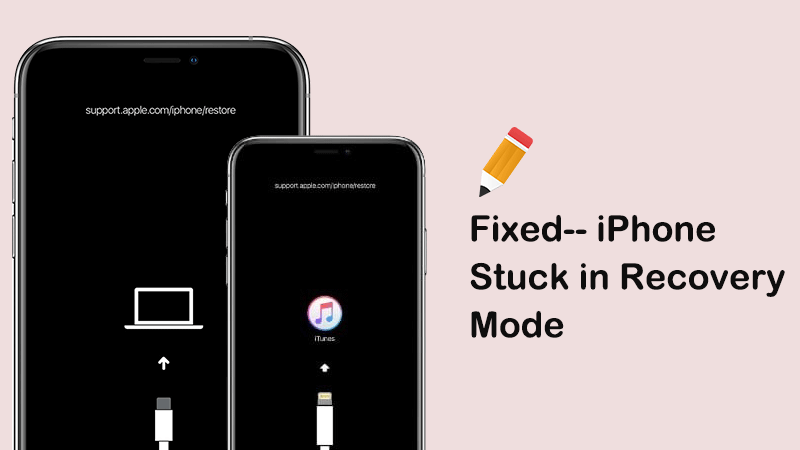
Fix 3: Restore Your iPhone in Recovery Mode
Restoring your iPhone in recovery mode is an effective way to resolve boot loop issues. This method can fix severe software problems by reinstalling the iOS, but it may result in data loss. Ensure you have a backup before proceeding.
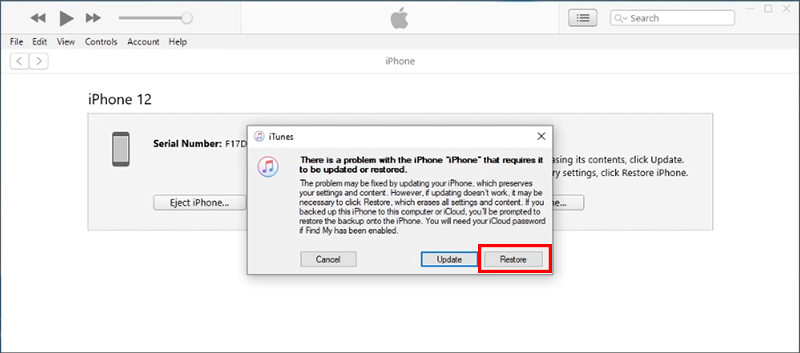
Step 1: Connect your iPhone to your computer using a USB cable and launch iTunes /Finder.
Step 3: After your iPhone is in recovery mode, iTunes or Finder will detect it and prompt you with options to Restore or Update the device. Select Restore and it will erase your iPhone and reinstall the latest version of iOS.
Step 3: Follow the on-screen instructions to complete the process.
Fix 4: Check hardware in Apple's Support Center
If none of the above solutions work, your iPhone might have a serious hardware issue. It's best to contact Apple Support or visit an Apple Store to have your device professionally inspected and repaired.
FAQs about iPhone Stuck in Boot Loop
1. What causes an iPhone to get stuck in a boot loop?
An iPhone can get stuck in a boot loop due to various reasons, including interrupted software updates, jailbreaking, unstable connections during updates, or hardware issues like screen or battery replacements.
2. Can a forced reboot fix a boot loop permanently?
A forced reboot can often resolve temporary software glitches that cause boot loops. However, if the underlying issue is more serious, such as a failed software update or hardware problem, the boot loop may return.
3. How do i get my iPhone 15 out of boot loop?
You can try the mentioned methods in this article. Or you can go to the Apple support center to get help.
Conclusion
It is extremely frustrating when your iPhone stuck in a endless boot loop. In this article, you can learn the useful ways to get your iPhone back to normal, whether use a simple forced reboot or using advanced tools like iSunshare iOS Repair Genius. Hope this guide can help resolve most boot loop issues and keep your iPhone running smoothly.