We use cookies for personalizing content and ads and providing social media features. Your usage information on our website will be used for social media, advertising, and traffic analytics, or shared with our partners. Clicking "Accept" means you agree to use our cookies .
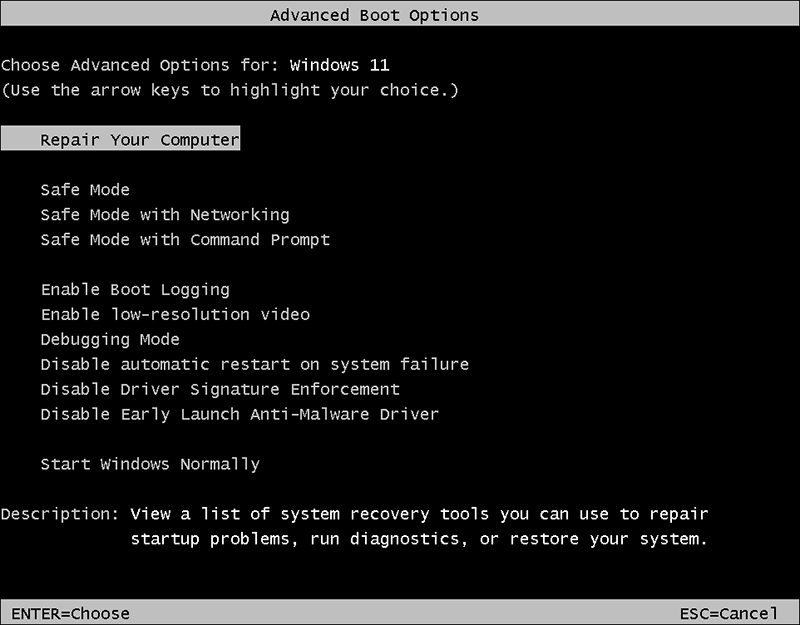
The Advanced Boot Options menu is essentially a boot menu. In it, you can access menus for boot settings, safe mode, and various other boot methods, and you can also use them to help you access and repair Windows 11. You must do this if your operating system is having problems starting or running. It allows you to start Windows in Advanced Troubleshooting mode. You can access this menu by turning on your computer and then pressing F8/F12 before Windows 11 starts.
1: What are included in the Advanced Boot Options?
Repair Your Computer
It can be used to fix startup problems, run diagnostics or restore a list of system recovery tools. This option is only available after these tools have been installed on your computer's hard drive. If you have the Windows installation CD, you can find these system recovery tools inside that CD.
Safe Mode
Start Windows with a minimal set of drivers and services.
Safe Mode with Networking
Start Windows in safe mode, including the network drivers and services needed to access the Internet or other computers on your network.
Safe Mode with Command Prompt
Use a Command Prompt window to start Windows in Safe Mode instead of booting through the normal Windows interface.
Enable Boot Logging
Create the file ntbtlog.txt, which lists all drivers that are installed during boot and may be useful for advanced troubleshooting.
Enable low-resolution video
Start Windows with the current video driver and low resolution and refresh rate settings. You can use this mode to reset the display settings.
Debugging Mode
Boot Windows in advanced troubleshooting mode for IT professionals and system administrators.
Disable automatic restart on system failure
Prevent Windows from restarting automatically when an error causes Windows to fail. Select this option only if Windows is stuck in a loop (i.e. Windows fails, tries to restart, and then fails again).
Disable Driver Signature Enforcement
Allow installation of drivers that contain improper signatures.
Start Windows Normally
Start Windows in normal mode.
2: Specific steps to set Windows 11 to access the Advanced Boot Options menu
Create a WinRE bootable USB drive
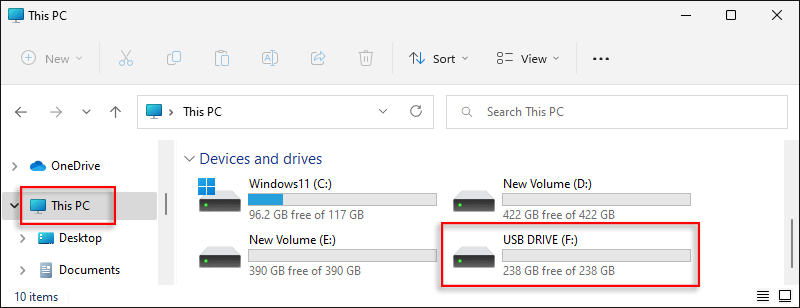
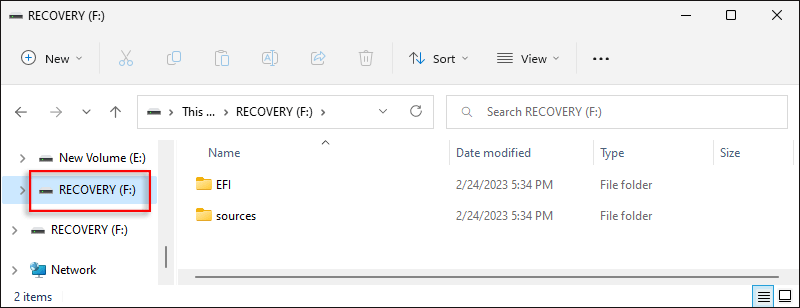
Step 1: Insert the USB drive in your computer and open This PC in the File Explorer, you can see that the USB drive has been identified and assigned a drive letter F.
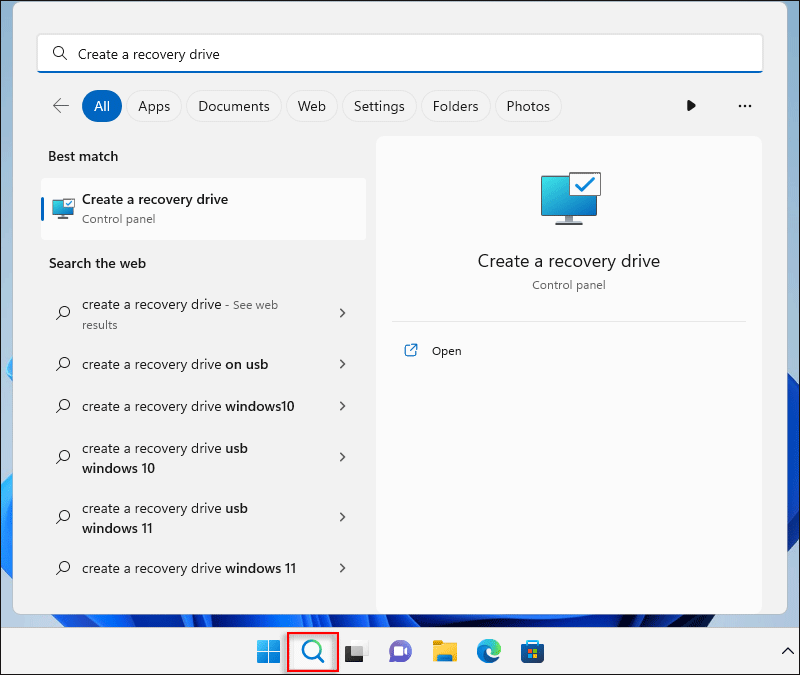
Step 2: Click Search on the taskbar to open the panel, then type: Create a recovery drive in the search box to search, click Open when you find it.
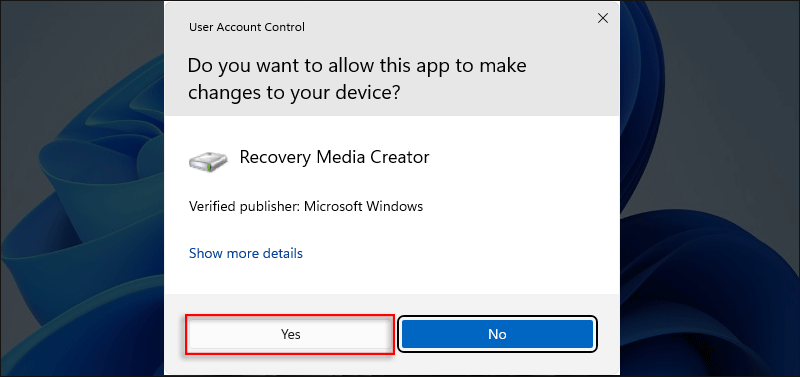
Step 3: Agree to the program's changes to the device and click Yes.
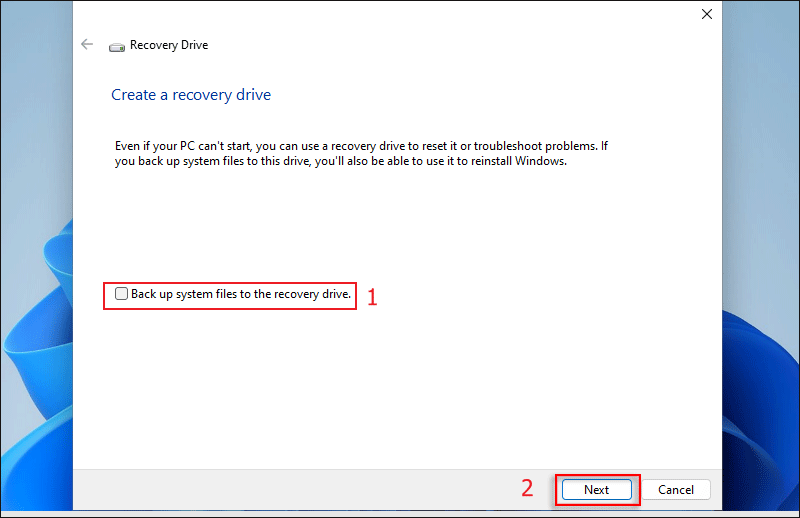
Step 4: In the Recovery Drive window, uncheck Back up system files to the recovery drive. Click Next to continue.
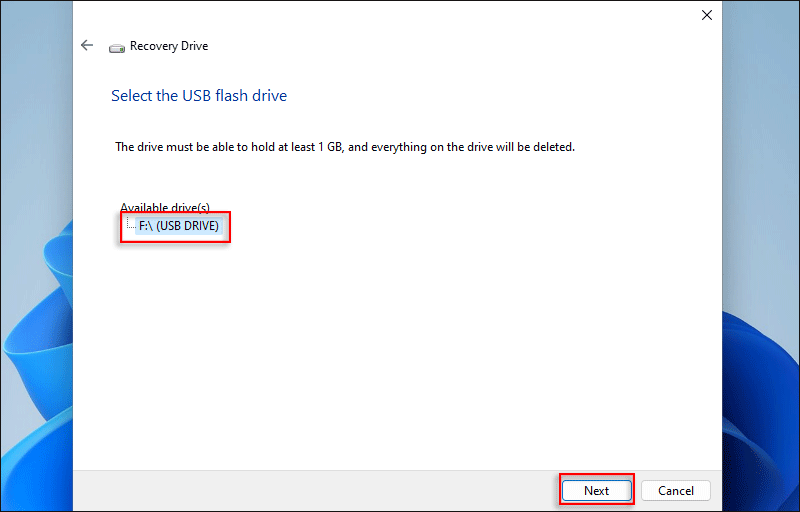
Step 5: Select the USB flash drive and click Next.
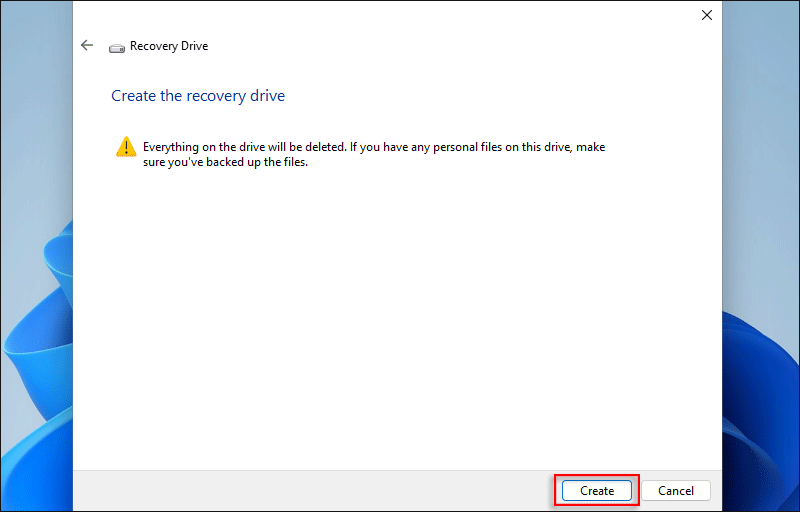
Step 6: Click Create option.
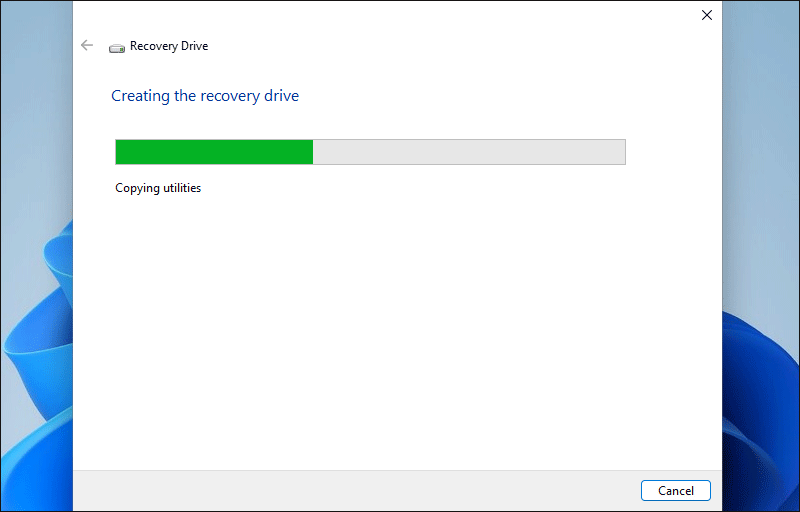
Step 7: Then it will start creating the recovery drive.
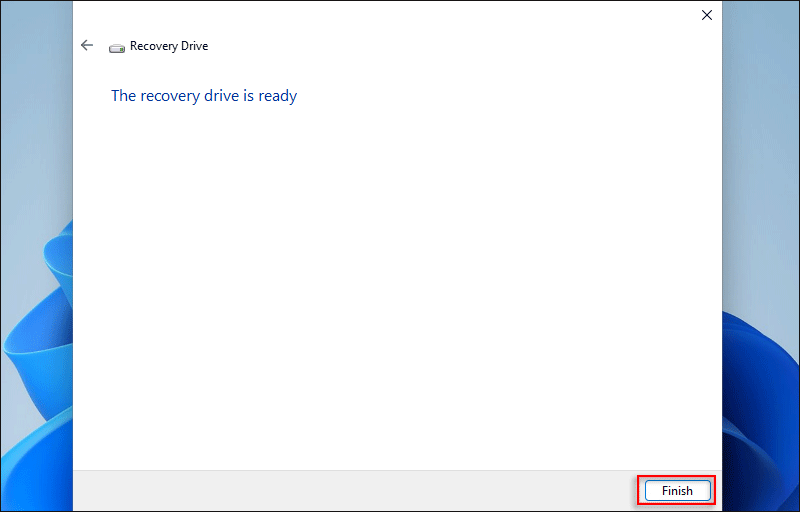
Step 8: When you are done creating, click Finish to close this window.
Step 9: Open F drive in the File Explorer and you will see that you have finished creating the recovery drive.
Select bootable USB drive to open WinRE system
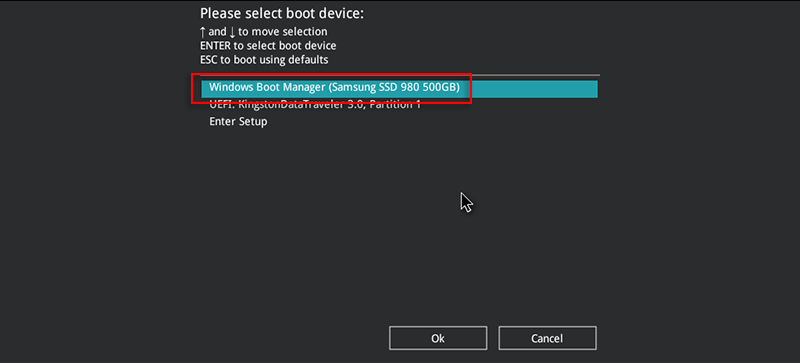
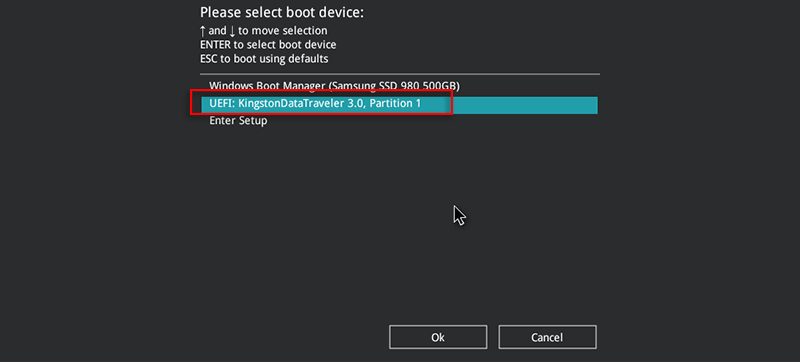
Step 1: Press the keyboard shortcut F8 or F12 immediately when booting your computer to open the BIOS/UEFI's Select boot device screen and use the down arrow on your keyboard to select the USB drive.
Step 2: Select the USB drive and open it.
Open Command Prompt in WinRE system and assign a drive letter to the EFI partition.
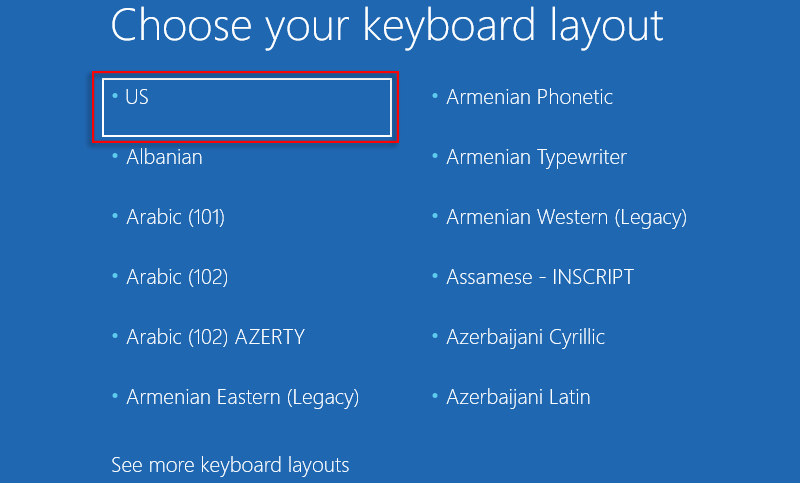
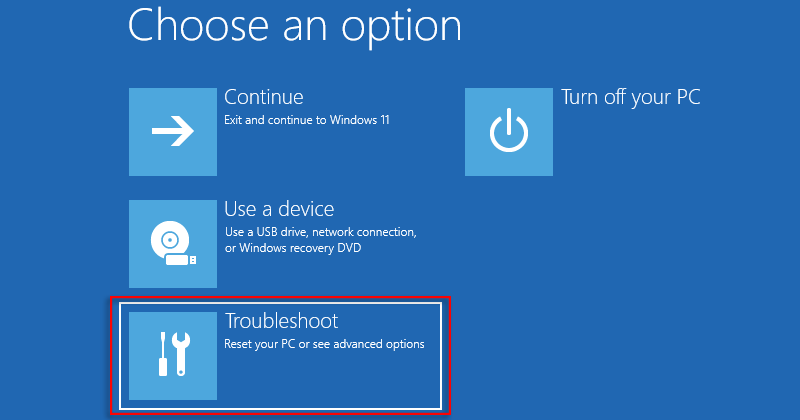
Step 1: Once you enter the WinRE system, select US to open it
Step 2: Then select Troubleshoot to open it.
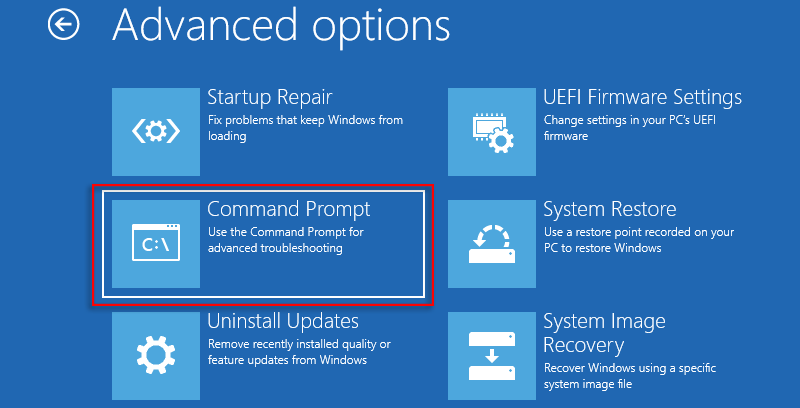
Step 3: Select Command Prompt and open it.
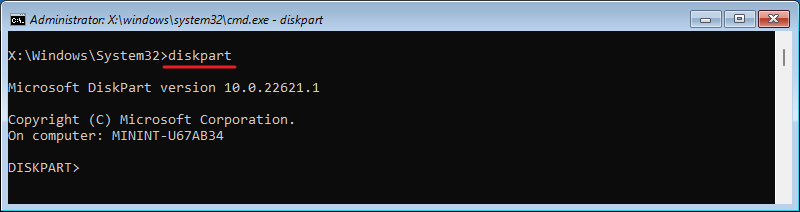
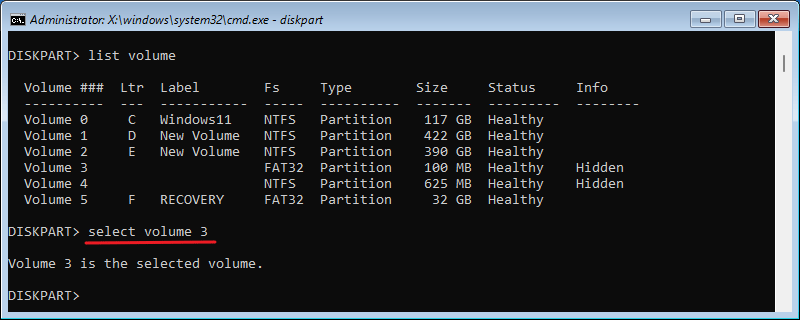
Step 4: Type the command: diskpart and press Enter to open the diskpart program.
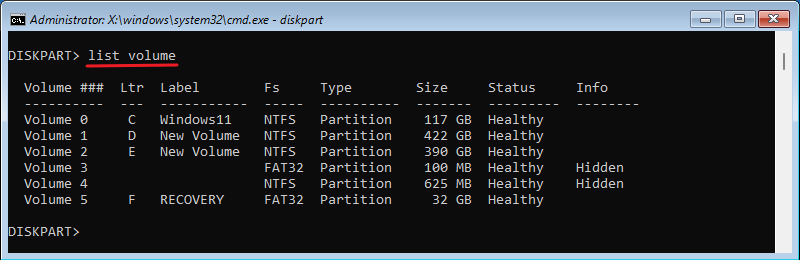
Step 5: Enter the command: list volume and press Enter to list all volumes of the disk. You can see that volume 3 is an EFI partition.
Step 6: Enter the command: select volume 3 and press Enter to select volume 3.
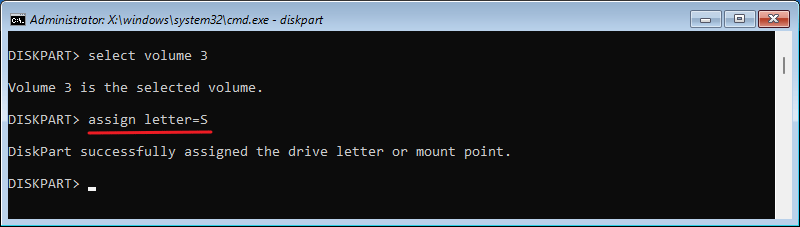
Step 7: Enter the command: assign letter=S Then press the Enter key to set the drive letter of volume 3 to: S.
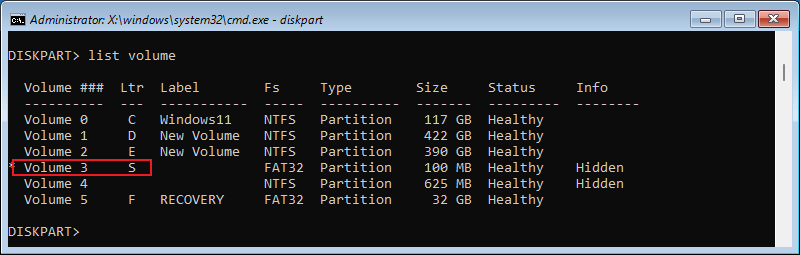
Step 8: Type the command: list volume and press Enter to list all volumes of the disk again. You can see that the drive number of volume 3 has been set to: S.
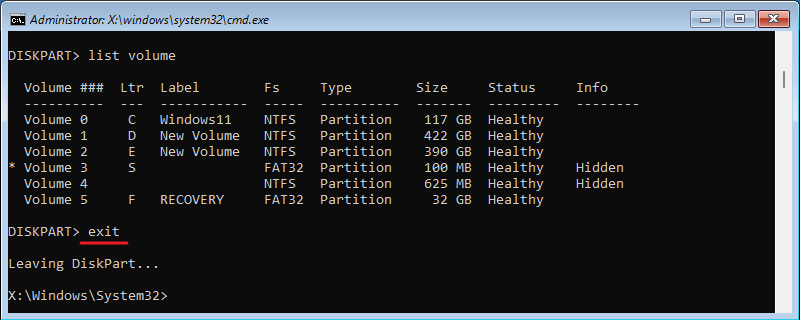
Step 9: Type the command: exit and press Enter to exit the diskpart program.
Use the bcdedit command to view the BCD configuration information in the EFI partition and reboot the computer into the Advanced Boot Options menu
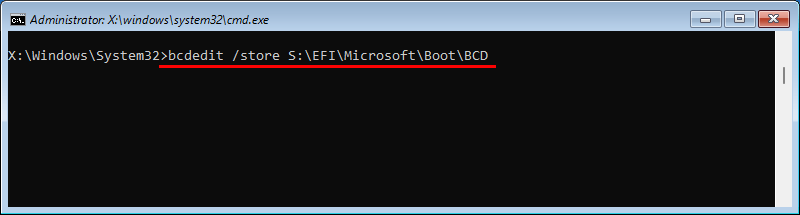
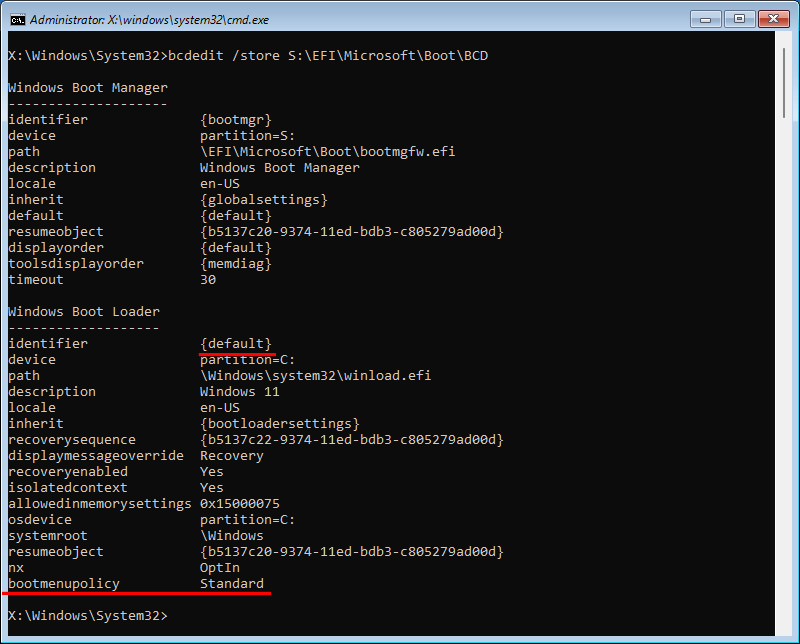
Step 1: Enter the command: bcdedit /store S:\EFI\Microsoft\Boot\BCD, then press the Enter key, this is to use the bcdedit command to view the configuration information of the BCD under the path S:\EFI\Microsoft\Boot\.
Step 2: You need to change the bootmenupolicy option for the identifier {default} to: Legacy.
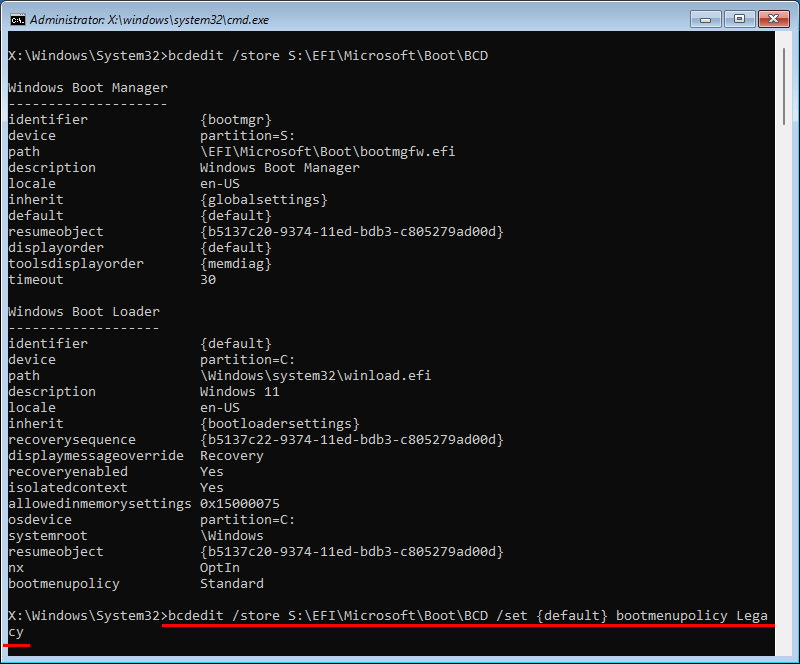
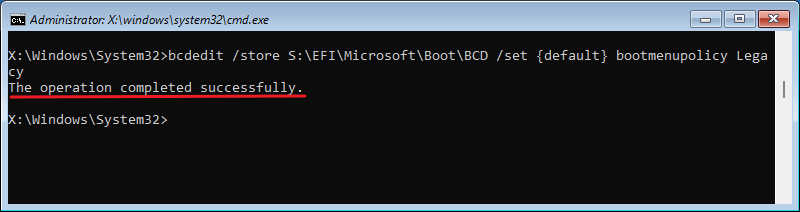
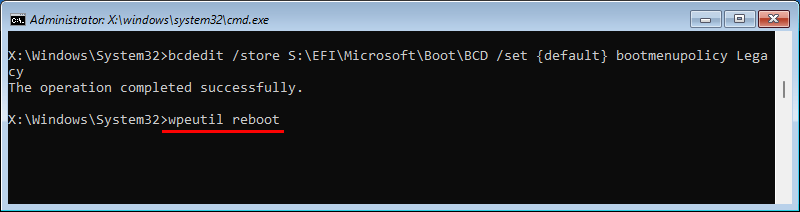
Step 3: Enter the command: bcdedit /store S:\EFI\Microsoft\Boot\BCD /set {default} bootmenupolicy Legacy, then press Enter, this is to use the bcdedit command to specify S:\EFI\Microsoft\Boot\path under BCD, modify the bootmenupolicy option for the identifier {default} to: Legacy.
Step 4: Finish using the bcdedit command to specify the BCD under the path S:\EFI\Microsoft\Boot\ and modify the bootmenupolicy option for the identifier {default} to: Legacy.
Step 5: Enter the command: wpeutil reboot and press Enter to restart the computer.
Step 6: Reboot your computer and wait for the BIOS/UEFI to boot and immediately press the keyboard shortcut F8 to enter the Advanced Boot Options menu interface and select the desired option to enter.