We use cookies for personalizing content and ads and providing social media features. Your usage information on our website will be used for social media, advertising, and traffic analytics, or shared with our partners. Clicking "Accept" means you agree to use our cookies .
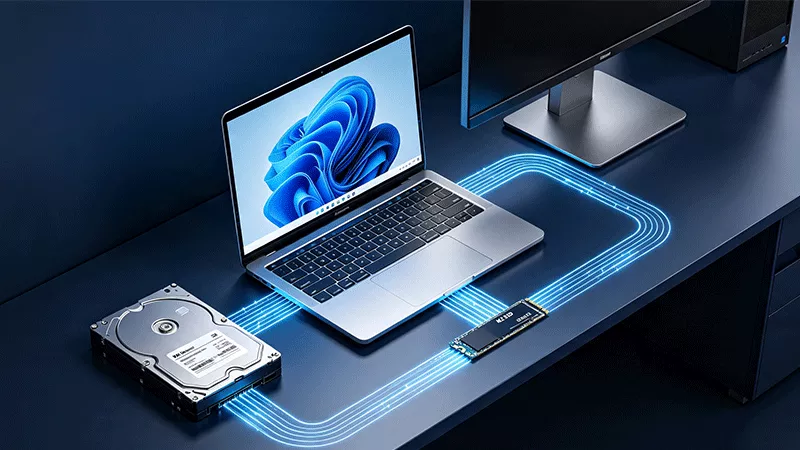
Is there any easy way to upgrade your computer with new M.2 SSD? Does it need to reinstall Windows 11? Don’t worry, upgrading to an M.2 SSD doesn't have to mean reinstalling Windows 11. With the right cloning method, your entire setup — programs, passwords, files, and activation — moves to the new drive intact, no clean install needed.
This guide covers the full process of moving your existing Windows 11 installation onto a faster M.2 SSD — no clean install, no lost files, no reactivation headaches: cloning your system drive, setting the SSD as your boot device, and confirming everything transferred correctly.
Before You Start: Ownership & Data Safety
1. Only migrate a drive you own or are authorized to modify. Cloning system drives on a shared or company-owned PC without permission may violate IT policy.
2. Back up anything irreplaceable (photos, documents, project files) to an external drive or cloud storage before touching partitions — cloning is generally safe, but power loss or a disconnected cable mid-clone can corrupt data.
3. If your HDD shows SMART warnings or has been making unusual noises, image the important files off it first; don't rely on the clone as your only copy of critical data.
Why Move Windows 11 to an M.2 SSD in the First Place
A mechanical hard drive is almost always the slowest component in an otherwise modern PC. Windows 11, with its heavier background services, search indexing, and Windows Update footprint, feels the difference immediately once it's running from NAND flash instead of spinning platters. Boot times measured in a minute or more on HDD typically drop under 15 seconds after migration, and everyday tasks — opening apps, switching between browser tabs with dozens of pages loaded, resuming from sleep — all sharpen up.
The appeal of a direct migration over a fresh install is simple: your installed programs, drivers, saved passwords, desktop layout, and license activation all travel with the clone. A clean install gets you speed too, but it also means reinstalling every application, digging up serial keys, and rebuilding your workflow from zero. For most people, migration is the faster path to the same result.
What You'll Need
An M.2 SSD with enough capacity to hold your current used space (check Settings > System > Storage for your current usage, then buy at least 20–30% headroom above that).
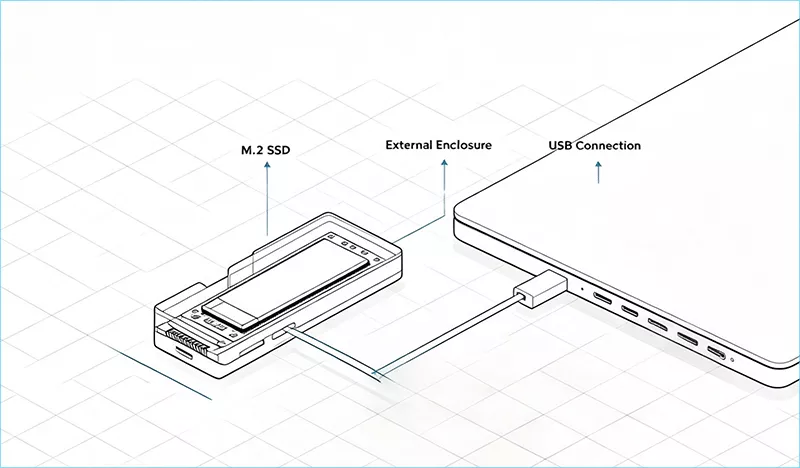
A way to connect the new SSD to your PC during the clone. Desktop users with a free M.2 slot can install it directly; laptop users, or anyone without a spare slot, will need an M.2-to-USB enclosure or a SATA-to-USB adapter for an interim connection.
Cloning software capable of copying an active Windows system drive, including boot-critical partitions (EFI System Partition, MSR, Recovery).
A charged laptop battery or a desktop connected to a UPS — cloning is not something you want interrupted by a power flicker.
15–60 minutes, depending on how much data is on the source drive and whether you're using USB 3.0/3.1 or a slower connection.
Step 1: Check Your Current Disk Layout
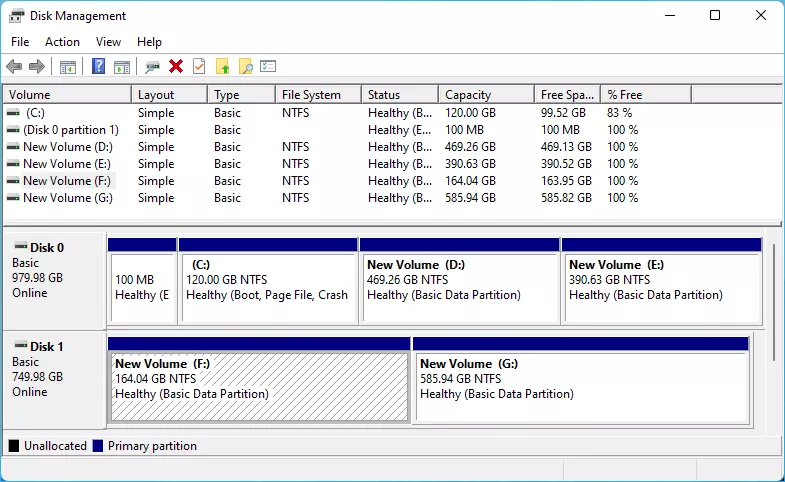
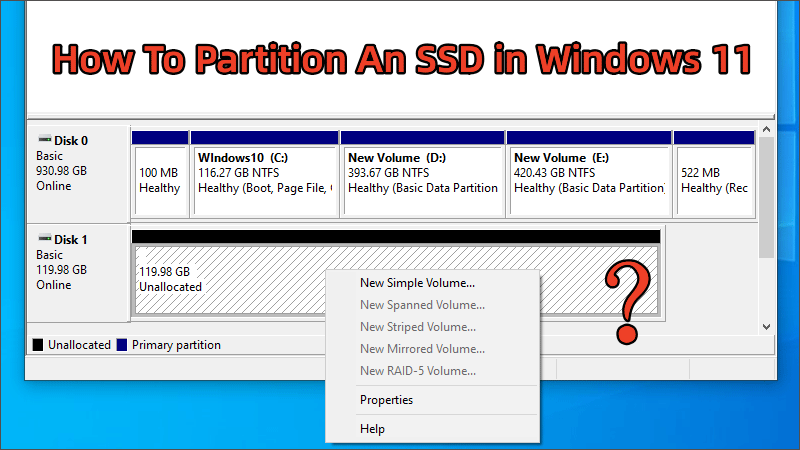
Before cloning anything, confirm how your HDD is partitioned. Press Windows + X and open Disk Management. A typical Windows 11 boot disk has four partitions: a small Recovery partition, the EFI System Partition, the main C: drive, and sometimes a second small Recovery partition at the end. Good cloning software copies all of these automatically, but it's worth knowing what's there so you can verify nothing was skipped after the clone completes.
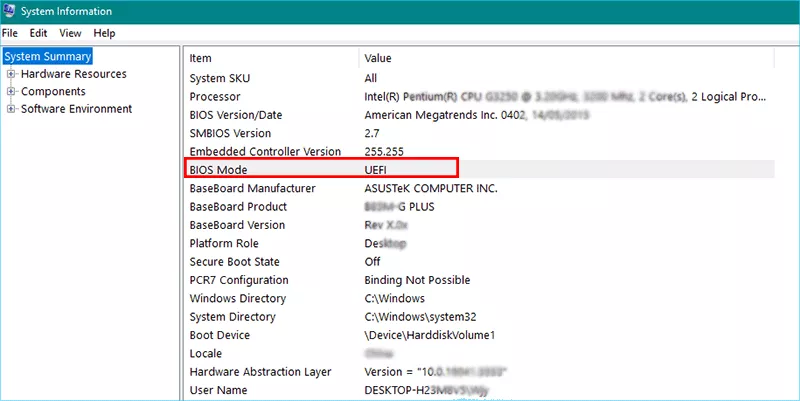
Also confirm your firmware mode. Open msinfo32 (Windows key, type System Information) and look at "BIOS Mode." If it says UEFI, your new SSD needs a GPT partition table — virtually every modern cloning tool handles this conversion automatically when disk sizes or types don't match exactly, but it's a detail worth being aware of if you ever troubleshoot a boot failure later.
Step 2: Connect the M.2 SSD to Your System
If you have a desktop with an open M.2 slot on the motherboard, install the new SSD directly — this also lets the cloning software write to it at full native speed. For laptops or desktop computers lacking an extra slot, mount the SSD inside an external M.2 NVMe enclosure and establish a USB connection. USB 3.0 or faster is strongly recommended; USB 2.0 will work but can turn a 10-minute clone into an hour-long one on larger drives.
Once connected, open Disk Management again to confirm Windows sees the new drive. It's normal for it to show as "Not Initialized" or "Unallocated" at this point. You can initialize it based on the checked partition style in previous step. And then create a new volume for the M.2 SSD.
Step 3: Clone the Drive with iSunshare CloneGo
This is the essential step that actually moves Windows 11 without a reinstall. Rather than copying files one by one (which misses boot records and system-reserved partitions), Windows cloning software creates a sector-level or intelligent block-level copy of the entire source disk, including everything Windows needs to boot independently on the new hardware.
iSunshare CloneGo is built specifically for this kind of system migration: it detects the source and target disks automatically, clones the OS along with all boot-related partitions, and includes an option to set target partition as the boot disk so the process finishes faster when the SSD is smaller than the HDD but still has enough room for your actual data.
1. Install and launch iSunshare CloneGo while both the source HDD and target M.2 SSD are connected.
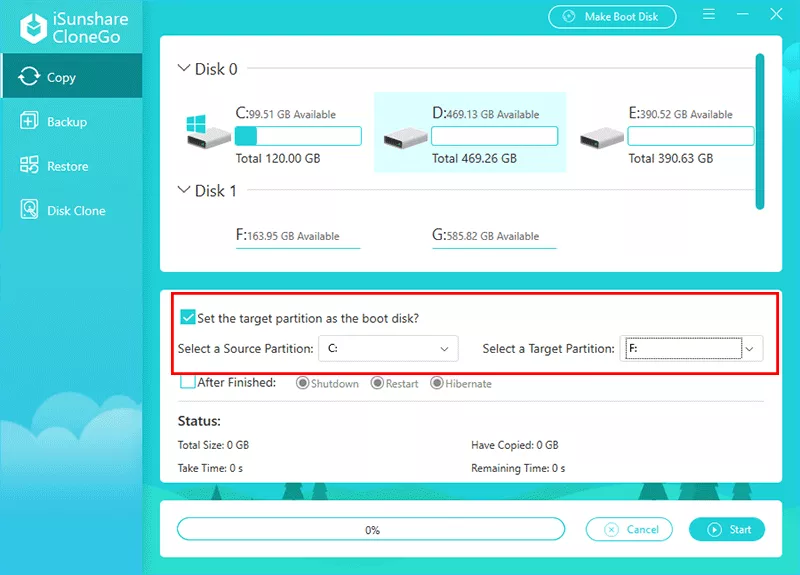
2. Select the Copy option on the left menu. Then choose your current OS partition as the source, the new M.2 SSD drive as the destination.
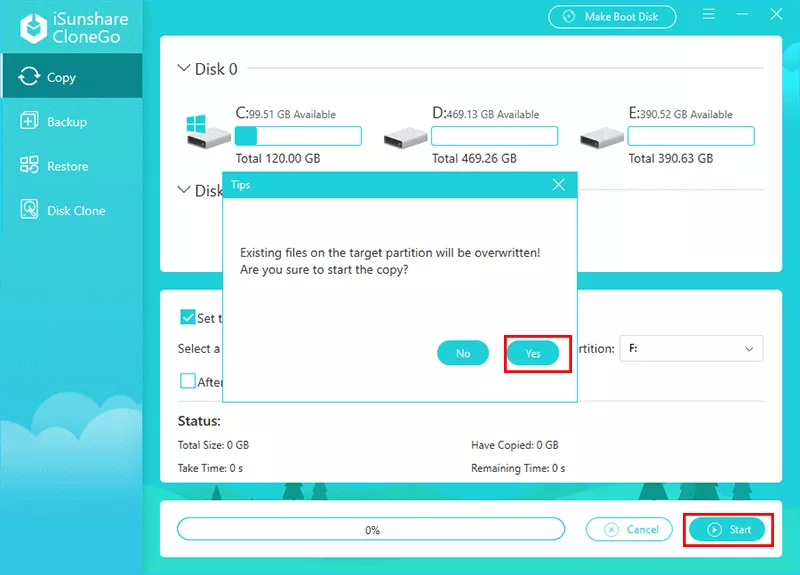
3. Double-check this selection carefully, since cloning overwrites everything on the destination drive. And make sure “Set the target partition as the boot disk” is checked. After that, click the Start button and confirm your operation.
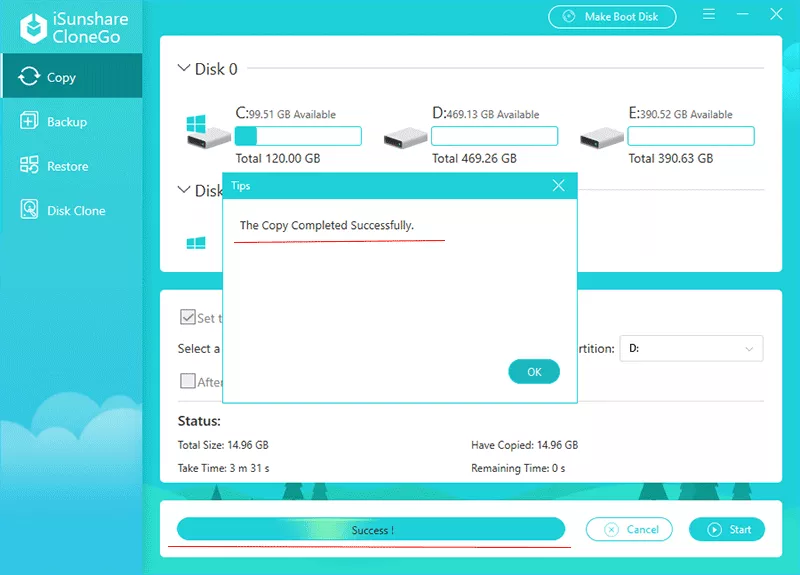
4. Let the software run uninterrupted. Avoid opening large applications or downloading files on the source drive while the process is active. Once finished, the software will confirm completion and can usually verify the clone before you reboot.
Step 4: Set the SSD as Your Boot Drive
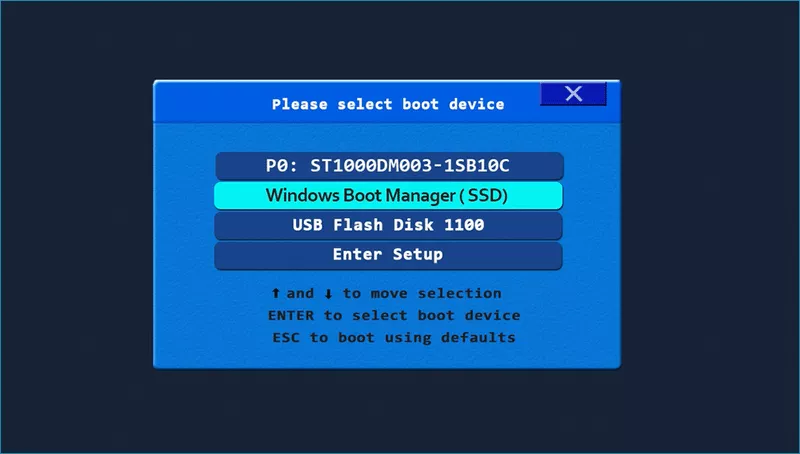
With the clone complete, shut the PC down fully (not sleep or restart) and, if using a desktop, physically install the M.2 SSD into its motherboard slot if it wasn't already. Boot into your firmware settings (commonly Del, F2, or F10 during startup — check your motherboard or laptop manufacturer for the exact key) and locate the Boot Order or Boot Priority menu.
Move the new M.2 SSD to the top of the boot list, above the old HDD. Save and exit. Windows 11 should start normally from the SSD — often noticeably faster from the very first boot. If the system immediately boots back to the original hard drive, verify that the SSD is registered as a UEFI boot device—not a legacy/CSM entry. Mismatched boot modes are the leading reason cloned drives fail to boot on the first attempt.
Step 5: Verify Everything Migrated Correctly
Open File Explorer and confirm your files, folders, and installed programs are all present and open normally.
Check Settings > System > About to confirm Windows 11 still shows as activated — a proper clone carries activation status over automatically since the hardware ID and installation remain linked.
Open Device Manager and confirm there are no new "unknown device" warnings, which would suggest a driver conflict rather than a clone issue.
Run a quick benchmark or simply time a cold boot to confirm you're actually seeing the expected speed improvement.
Step 6: What to Do with the Old HDD
After running the SSD as your primary drive for several days with no problems, you have three practical choices for the original HDD: wipe it and reuse it for additional storage; leave it intact for one to two weeks as a fallback backup before erasing its data; or remove it completely from your system if you have no use for the extra drive bay.
Avoid the temptation to leave both drives bootable long-term with the same Windows installation — this can occasionally cause the boot manager to reference the wrong disk after firmware updates or hardware changes.
Troubleshooting Common Migration Issues
Issue 1: The system boots to a black screen or "No Bootable Device"
This almost always traces back to boot mode. Re-enter your firmware settings and confirm the boot order lists the SSD in UEFI mode, not Legacy/CSM. If your cloning software offers a "rebuild boot" or "fix MBR/EFI" repair tool, run it with only the new SSD connected.
Issue 2: Windows shows activation as not activated
This is rare after a like-for-like clone but can happen if the motherboard changed at the same time as the drive (for example, migrating during a full rebuild). Running the built-in Activation troubleshooter under Settings > System > Activation usually resolves it within a few minutes, since it's tied to your Microsoft account or hardware hash rather than the physical disk.
Issue 3: The clone finished but the new drive isn't listed as an option in boot order
Some firmware only lists boot devices it detected at the last cold boot. Fully power off (not restart), wait ten seconds, and power back on before checking boot order again.
FAQs on Windows 11 Migration
Q1: Will cloning to a smaller SSD than my current HDD work?
Yes, as long as the SSD has more capacity than your actual used space (not your HDD's total capacity). Most cloning tools clone only used sectors by default for exactly this reason.
Q2: Do I need to reactivate Windows 11 after migrating?
No. Because the same Windows installation and hardware identifiers move to the new drive, activation status carries over automatically in virtually all cases.
Q3: Can I clone an HDD to SSD while Windows is running?
Yes, iSunshare CloneGo offers the Disk Cloning function for users to clone the entire disk while Windows is running. If you want a faster cloning, use WinPE for a standard same-machine migration.
Q4: How long does a full Windows 11 migration typically take?
Most migrations complete in 15 to 45 minutes over a USB 3.0 connection, depending on how much data is being copied. Direct SATA or M.2-to-M.2 connections are faster still.
Conclusion
Migrating rather than reinstalling means less downtime and none of the setup fatigue that comes with rebuilding a PC from scratch. With the right cloning tool and a careful boot-order check afterward, moving Windows 11 onto an M.2 SSD is a same-afternoon project — not a weekend one.